
BMW N13 with a jerking engine and VANOS problem: why a correct diagnosis sometimes goes much further than one fault code
When it comes to technical faults on modern BMW engines, the same picture often still prevails: car in, read the fault code, replace the faulty part, problem solved.
In practice it very often does not work like that.
Some faults are clear and can quickly be traced back to one component. Other cases are much more complex. Then you are dealing with several symptoms at once, a history that plays a part, fault codes that do not tell the whole story, and parts you sometimes deliberately replace without being able to prove in black and white beforehand that precisely that one part alone is the full cause.
This BMW with the N13 engine was a good example of that.
And that is exactly why we thought it was worth writing up this case.
The history of this car matters
To understand this repair correctly, you first need to know the car's history.
This BMW had previously had a serious problem on cylinder 4. The cause was not a classic mechanical defect, but a fault in the DME/ECU that caused the ignition signal to the coil to drop out under dynamic load. On top of that, the car kept being driven with that problem for a long time.
According to the history, the car had already been looked at by several parties before that, including a main dealer, without anyone being able to definitively solve the real cause.
Because the car kept being driven with that fault, the heat load in cylinder 4 rose too high, with the result that the valve seat there came loose. We then bought the car, had the cylinder head overhauled and skimmed, rebuilt the engine and at the same time fitted a new timing kit, together with new oil and filter.
That is important to mention, because it shows two things:
- This car already had a technical history.
- The earlier major repair was not just a matter of parts, but a case in which proper diagnostic work was already needed to find the real cause.
The new complaint: jerking engine and rough running
After that earlier repair, the engine still turned out not to run as it should. The car was again showing jerking and rough engine behavior.
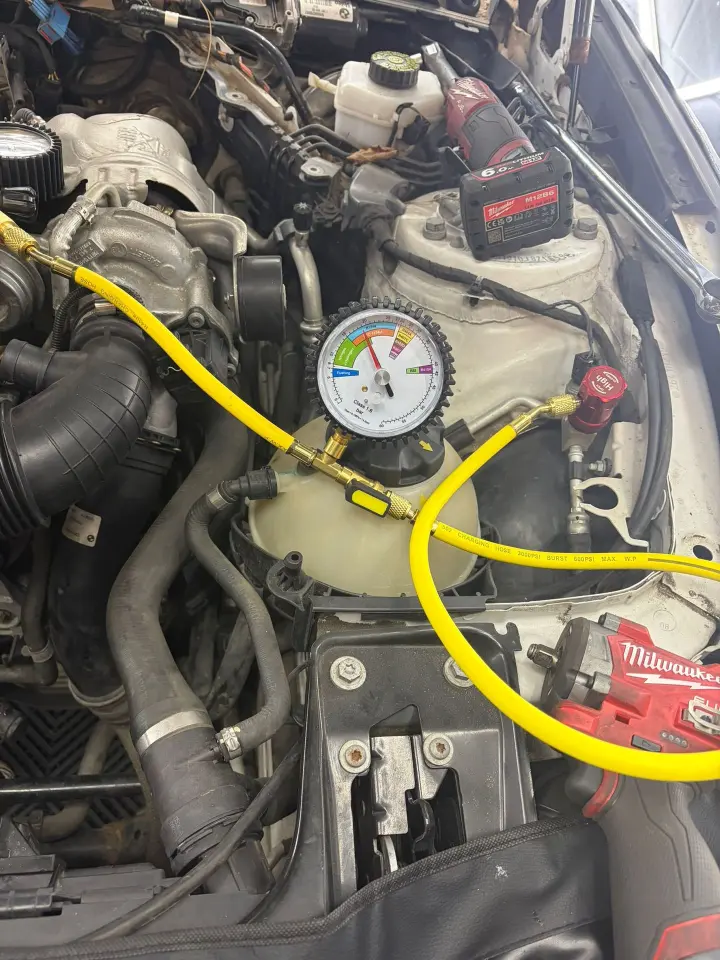
In addition, the customer also reported that the air conditioning was working less well. We checked that A/C problem separately with forming gas. No leak was found, after which the system was correctly refilled with leak detection dye, so that if there were a small leak after all, we would quickly see it should the A/C stop working again.
But the main issue of course remained the engine behavior.
Why this was not a simple diagnosis
This was not a case where one clear fault code was present that pointed directly to one faulty part.
On the contrary: the car showed symptoms that could point in several directions. The engine was not running correctly, but without one obvious, conclusive cause on the table from the start. Initially there was no fault code present either.
That is exactly the kind of case where many outsiders sometimes underestimate how many trade-offs a garage actually has to make.
Because yes, in theory you can always spend even more time on extra measurements, extra live data, extra scope recordings or extra function tests. But even then you do not always get a perfect, mathematical diagnosis in which one part can be identified 100% as the sole culprit.
Sometimes you have to move forward technically by:
- ruling out causes step by step,
- reasoning logically on the basis of symptoms,
- and deliberately choosing the most responsible next repair step.
That is something different from blindly replacing parts.
First step: checking again whether the mechanical basis is still right
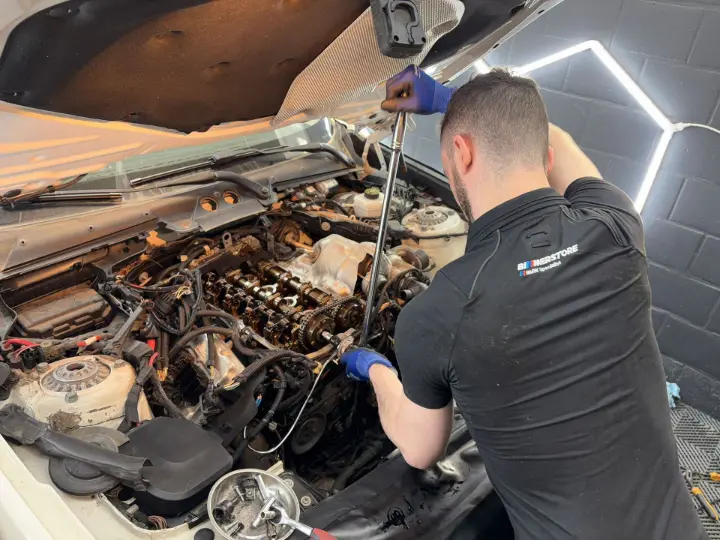
During the first checks we noticed that the jerking of the engine decreased when the serpentine belt was removed. That made us take another critical look at the mechanical timing and the basic build of the engine.
During that check we found that the central crankshaft bolt was no longer tightened to the correct specification.
That is not a detail. Certainly not in a design where parts are clamped together by friction. In such a situation you can say: “we just replace the bolt.” But if there has already been movement or friction there, as a specialist you want to think further than just the cheapest or quickest scenario.
That is why we did not just deal with the bolt, but decided to play it safe again and replace the timing drive once more. Not because that was the most attractive solution for us, on the contrary. But because we would rather create certainty right away than have to do the same work again later or saddle the customer with a risk of problems again.
Secondary deviation: cylinder 4 kept demanding attention
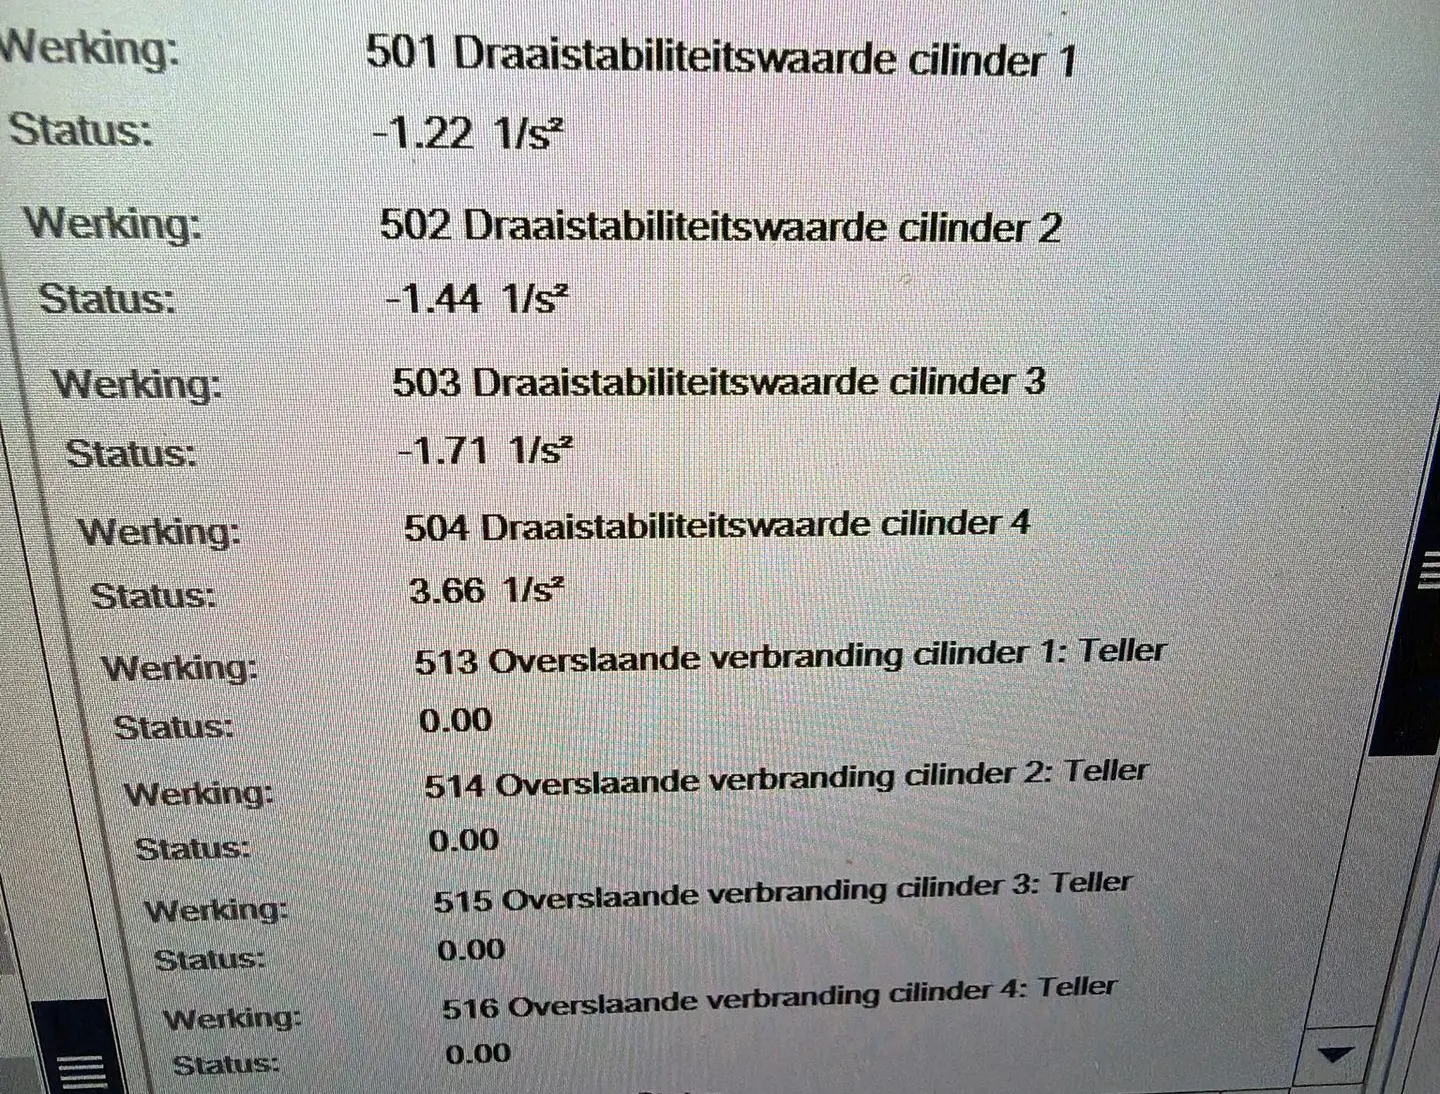
During further checks of the engine's running, we saw in the smooth-running values that cylinder 4 was again behaving abnormally, despite the fact that no clear misfire fault was stored right away.
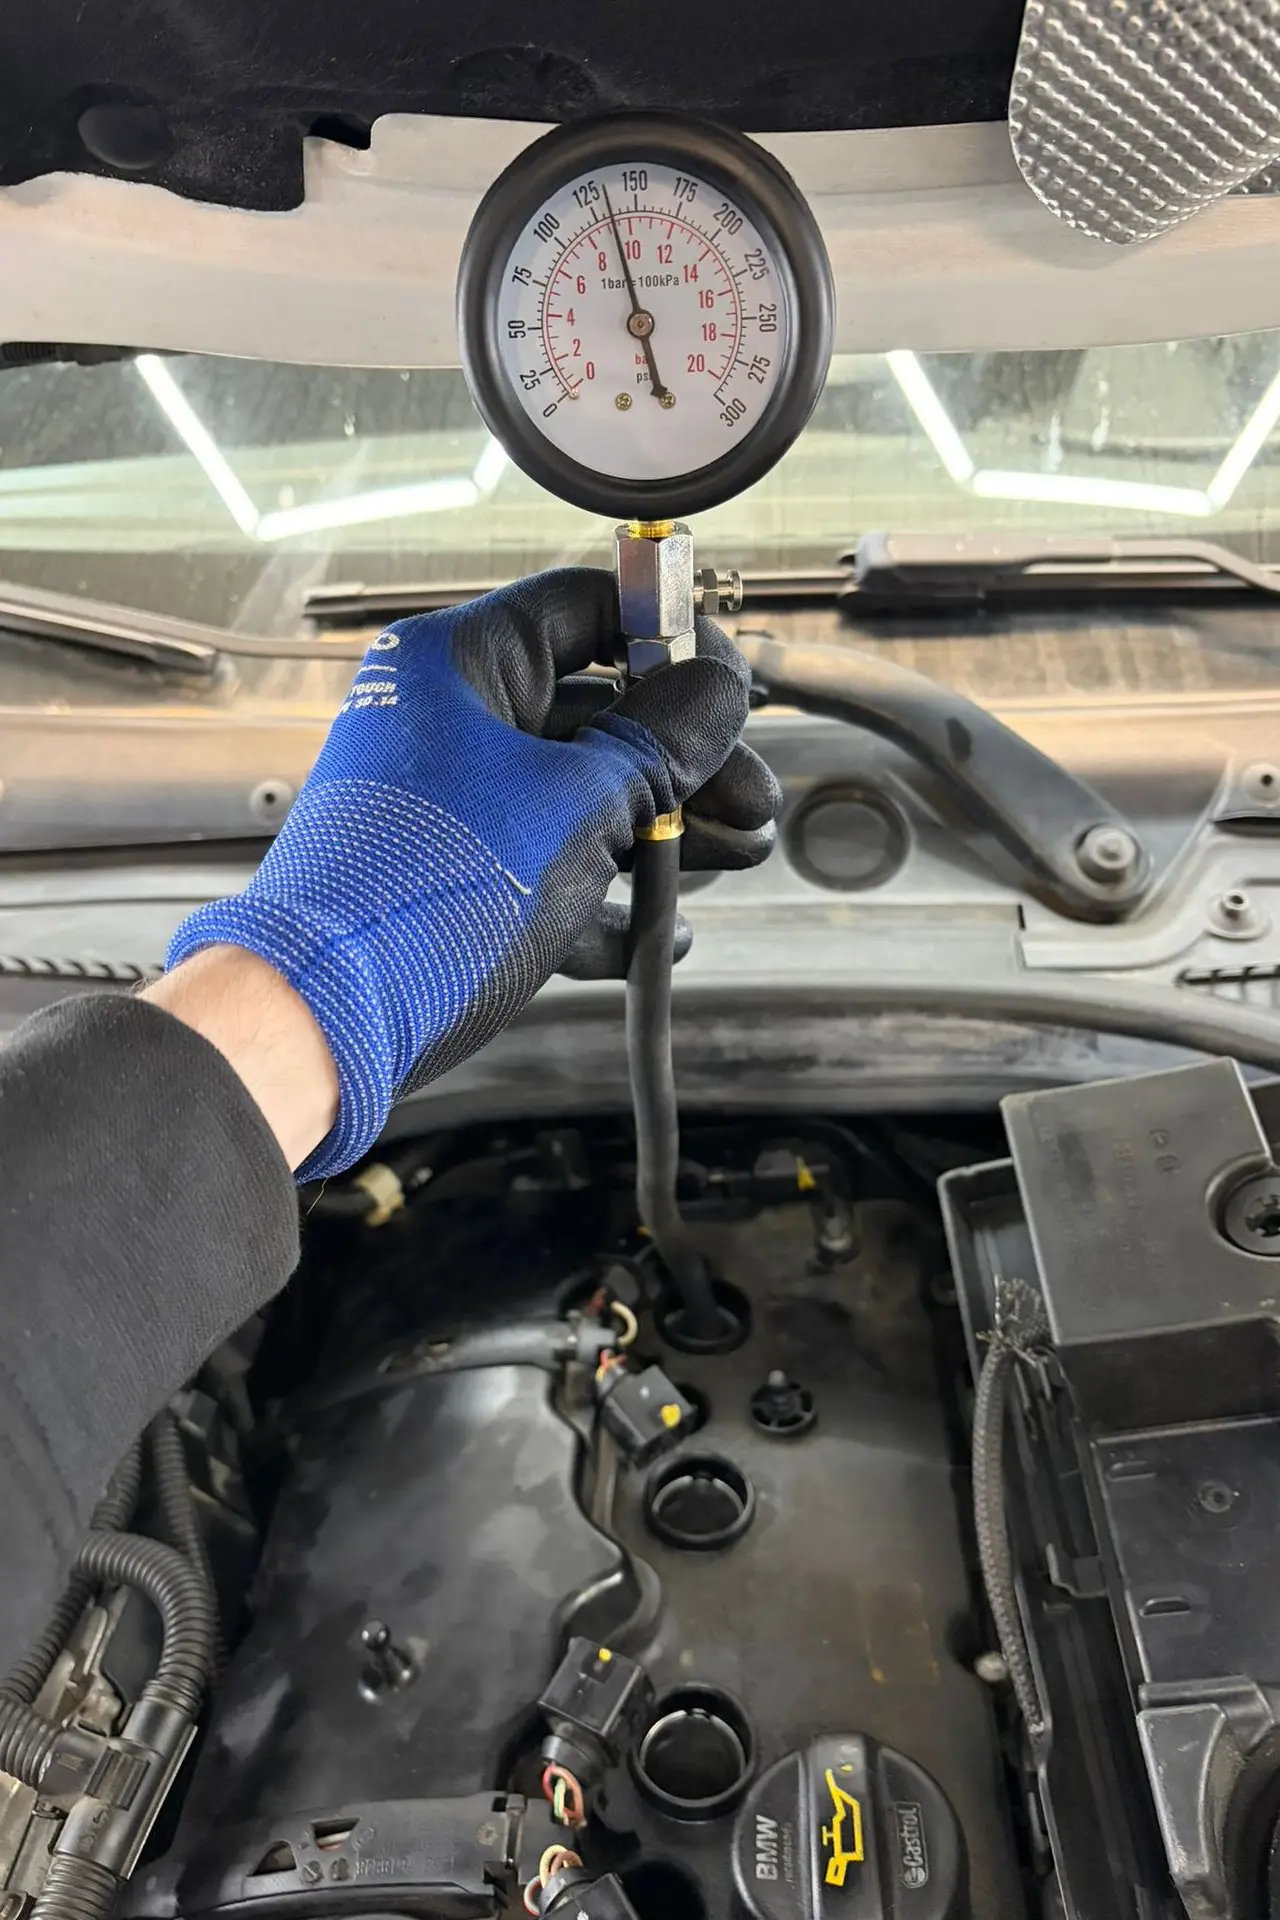
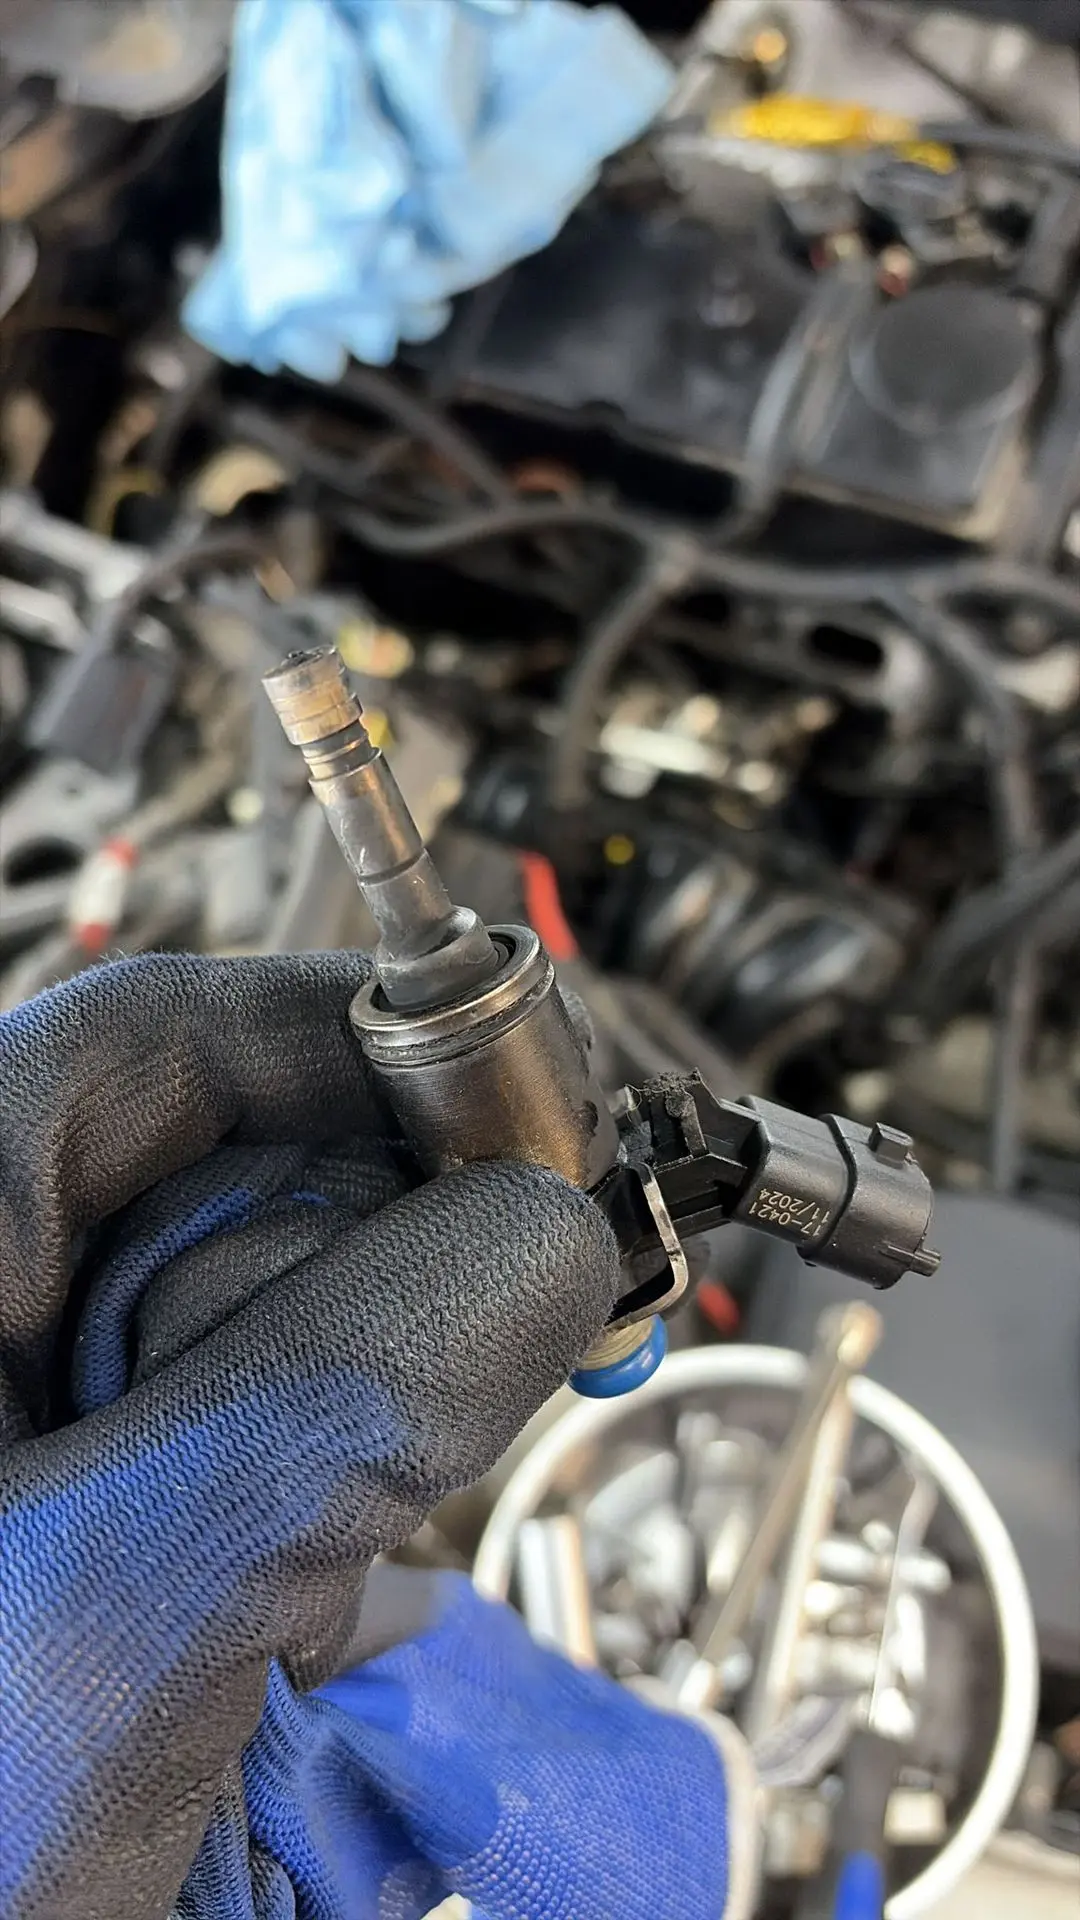
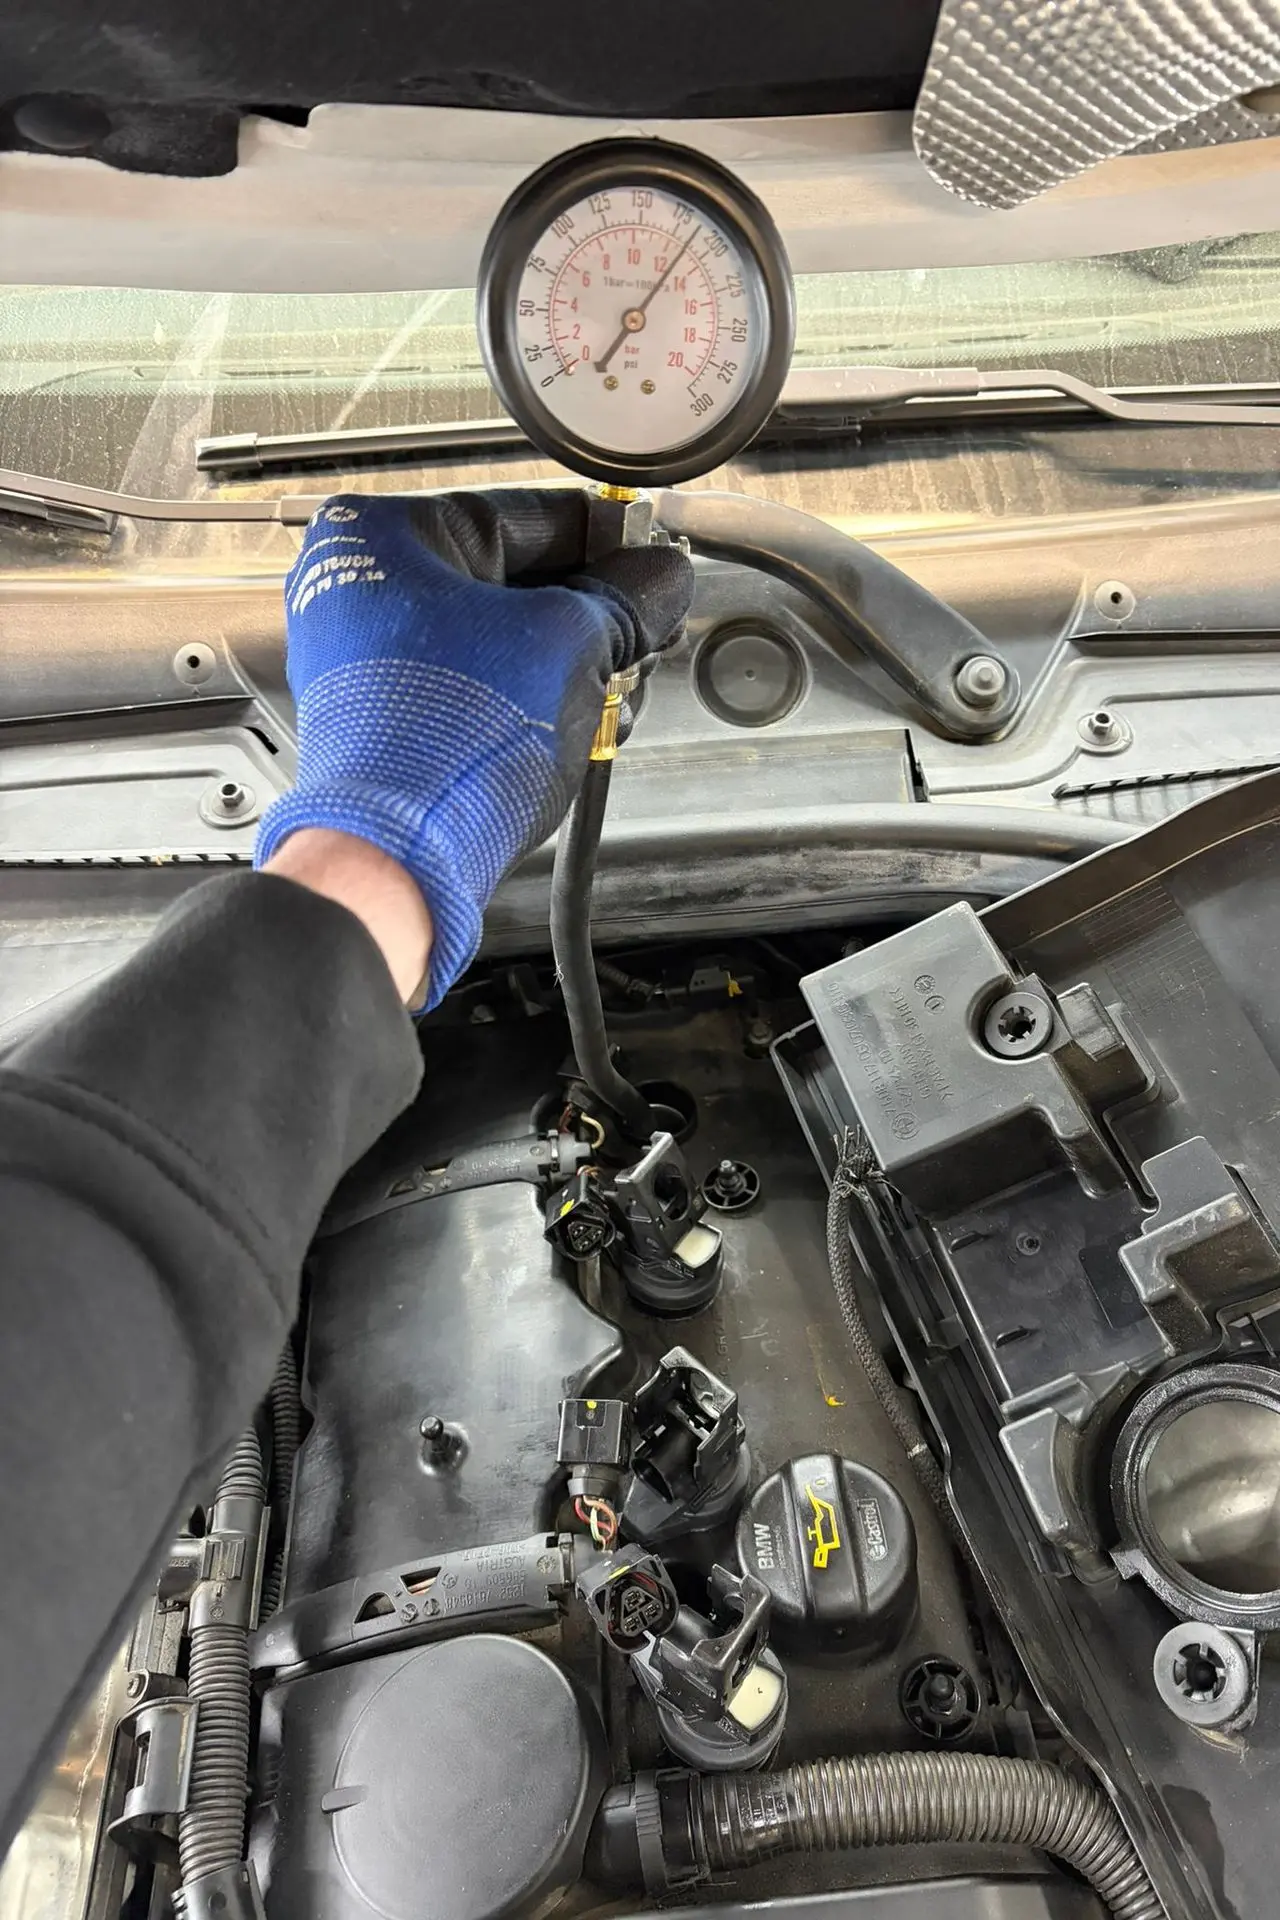
That is why we measured compression on all cylinders. This showed that cylinder 4 deviated from the rest. Further checks then pointed toward a problem that was ultimately solved by replacing the injector on cylinder 4.
After that replacement the compression was nicely even again and cylinder 4 was back at the same level as the other cylinders.
The engine then ran clearly better. But still not well enough.
And that is important: sometimes you have more than one deviation at the same time in one case. Solving one part does not automatically mean the car is fully repaired.
Long test drive: that is when the VANOS faults surfaced
After the first repairs we did a long test drive under various conditions.
Only after about 50 kilometers did the fault memory start to speak more clearly. First there was a fault on the intake side of the VANOS control: fault code 130108. After clearing it, a fault appeared on the exhaust side: fault code 130F20. And after clearing again, the fault came back on the intake side.
That indicated that there was still a problem in the variable camshaft timing.
We also saw that combustion was still not clean. Black soot was coming out of the exhaust and the engine was still not running as it should.

Why, under warranty, you sometimes replace parts without absolute certainty
That is an important point in this case.
With a repair, many people expect a garage to replace only that one part that is 100% certain to be faulty. But in practice complex diagnosis does not always work like that.
Take VANOS solenoids, for example, also called solenoid valves.
You can remove them, clean them, refit them and then test again. Or you can test them on the workbench. But that also takes labor hours. And if it then turns out that the problem is not solved, you have to do that same work again to replace the parts after all.
On a car with this mileage and this history it is then often technically more logical to replace a suspect part right away, especially if, as a specialist, you know it is a wear-prone part anyway that will be due for replacement in the medium term.
That is not blind guessing. It is a trade-off between:
- the likelihood that the part is involved,
- the mileage,
- the cost of double disassembly,
- and the wish not to confront the customer with the same complaint again later.
VANOS solenoids, oil and filter
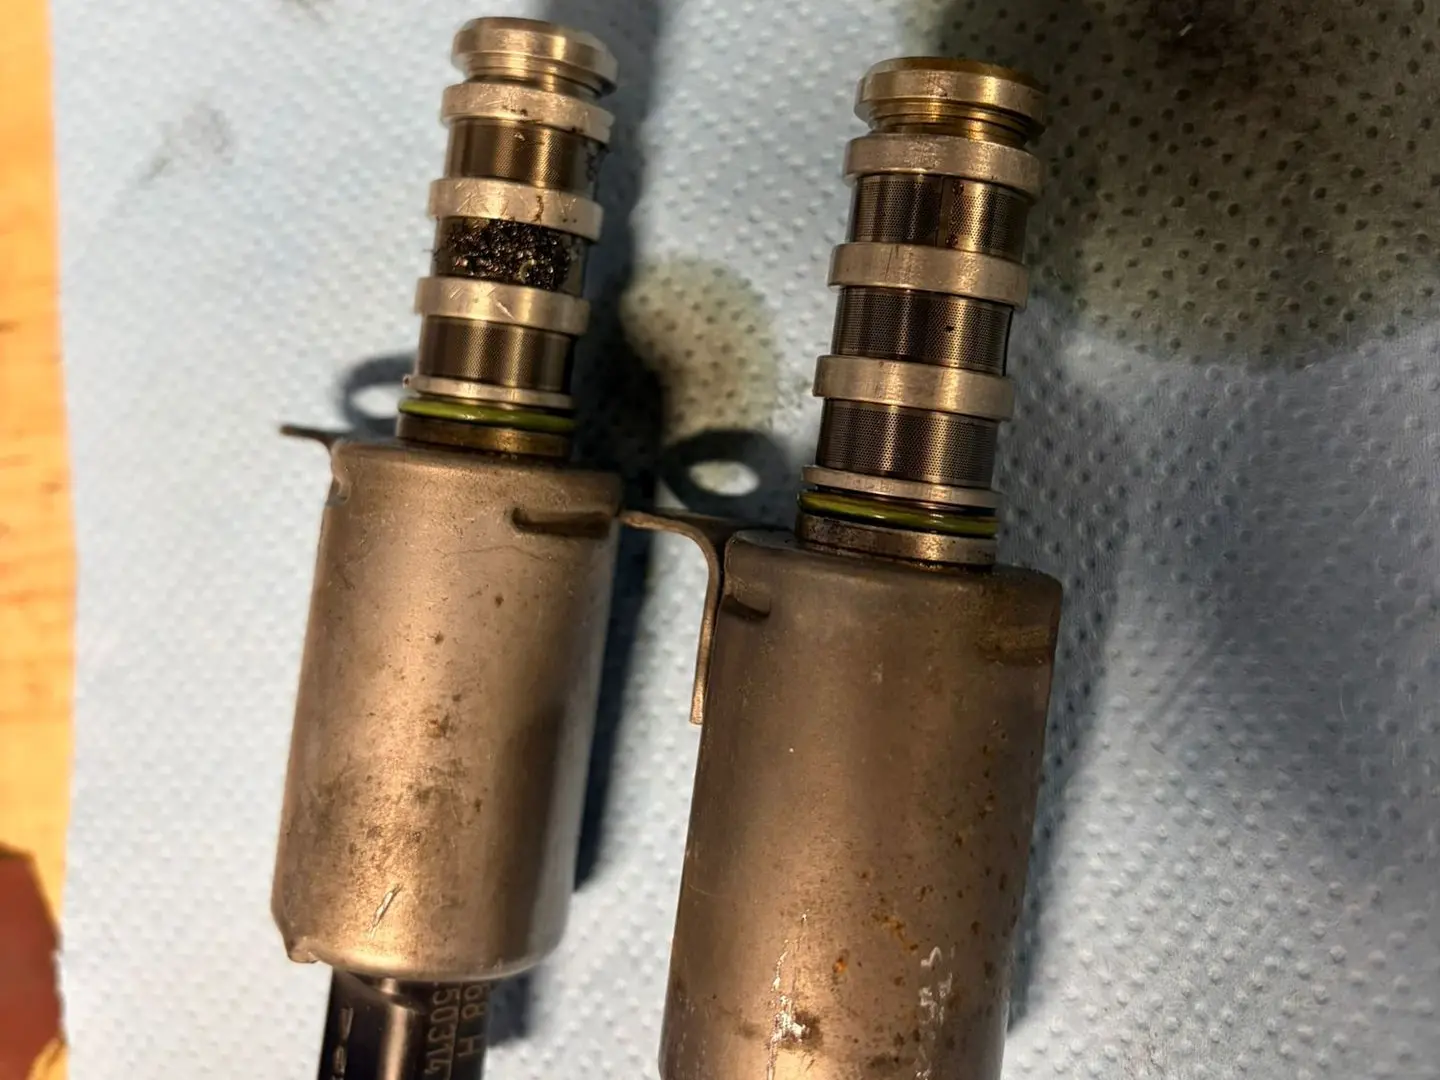
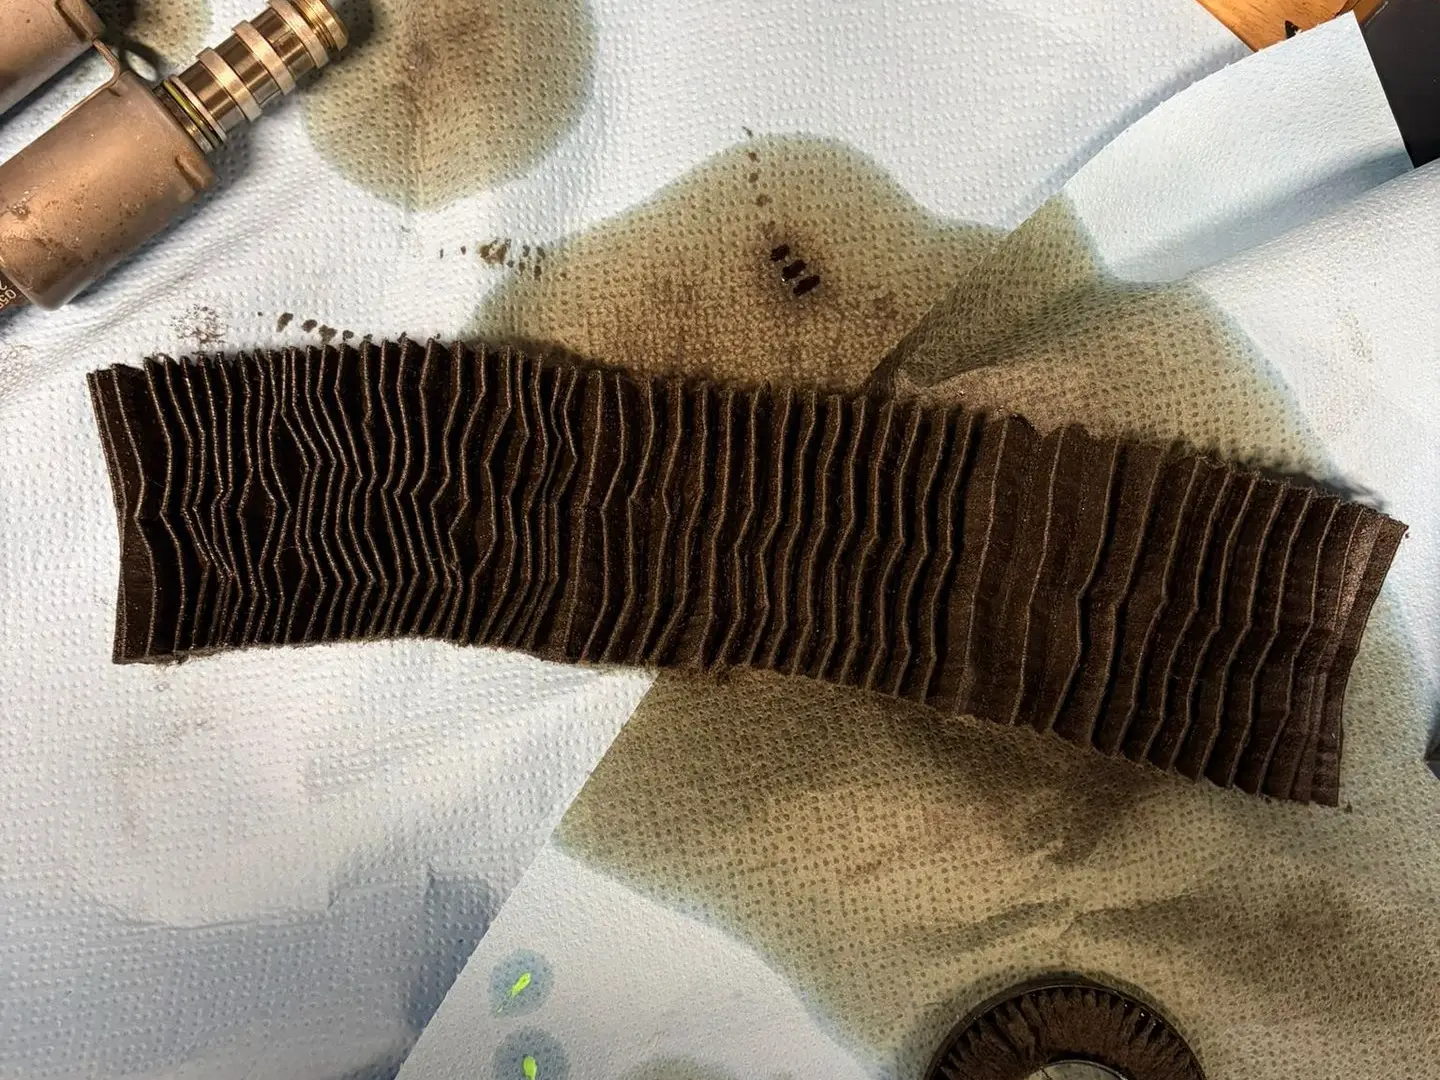
Because the intake side of the VANOS remained suspect, we checked and replaced the solenoids. The intake side showed contamination. That is why we also opened the oil filter and changed the oil again.
We saw no extreme metal contamination or severe internal damage in the filter, but enough reason to keep taking the oil circuit seriously in the diagnosis.
After those interventions the engine ran slightly better again, but we were not yet satisfied.
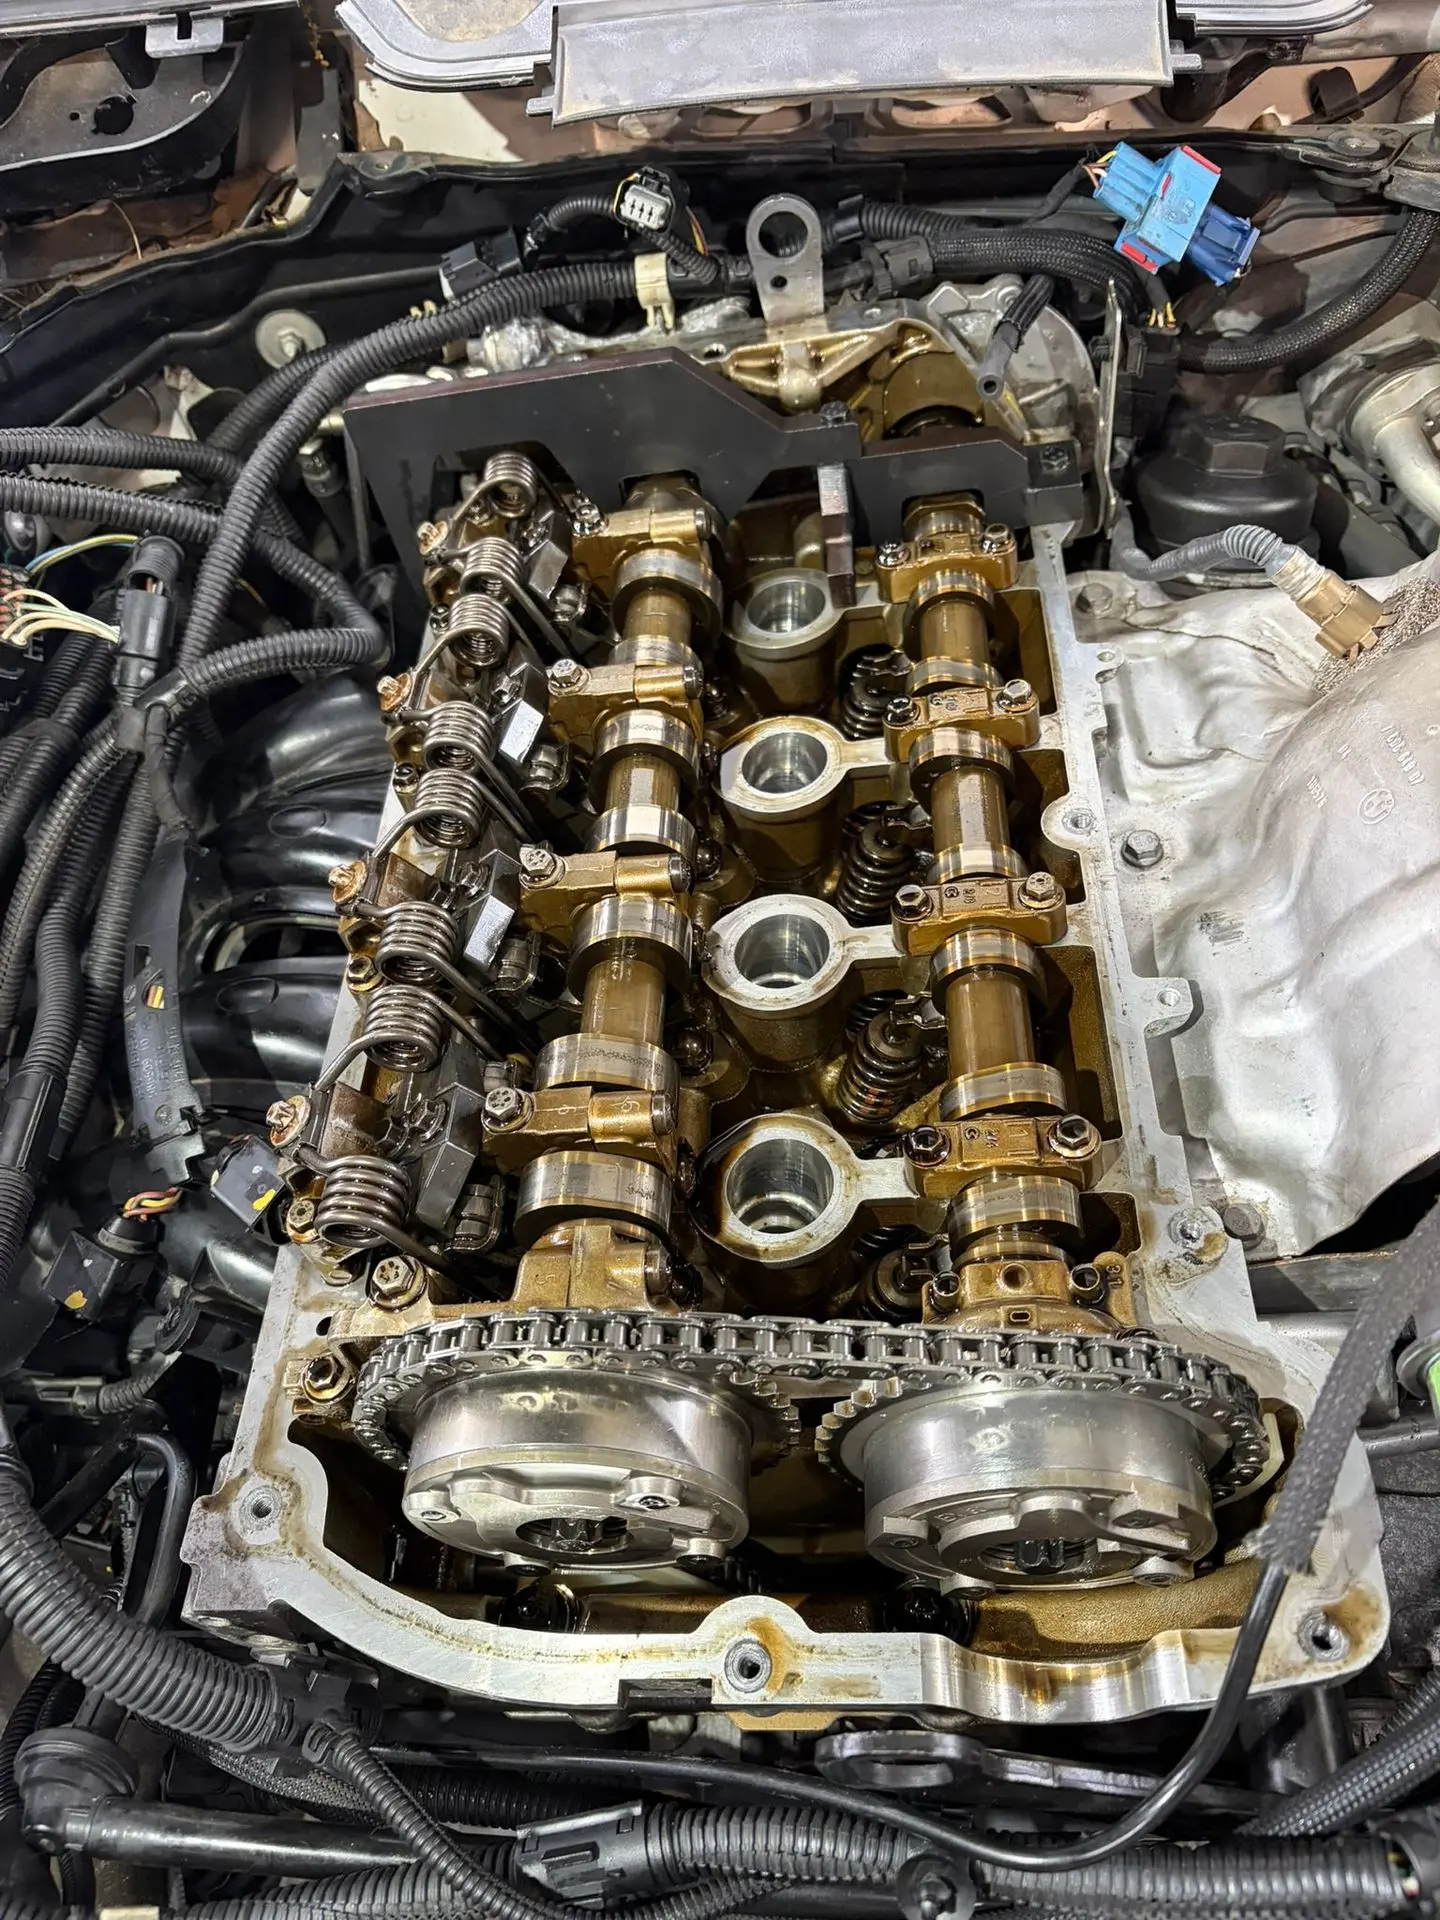
The function test of the VANOS solenoid valve on the exhaust side could run through completely. The one on the intake side aborted every time with the message that the timing had supposedly jumped or that the valve timing was not correct. This despite the fact that the engine was indeed in time every single time.
The Valvetronic procedure could be carried out normally.
In other words: the engine was again pointing mainly to a problem on the intake side of the VANOS control. To be safe, the oil, oil filter and both solenoids were therefore replaced.
Scope measurements: useful, but not always black and white
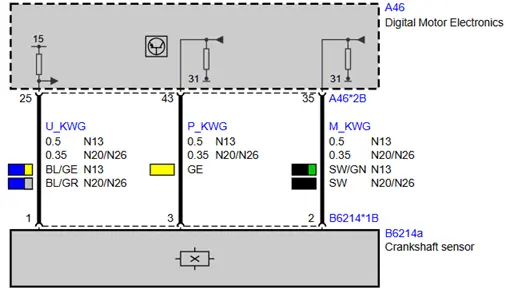
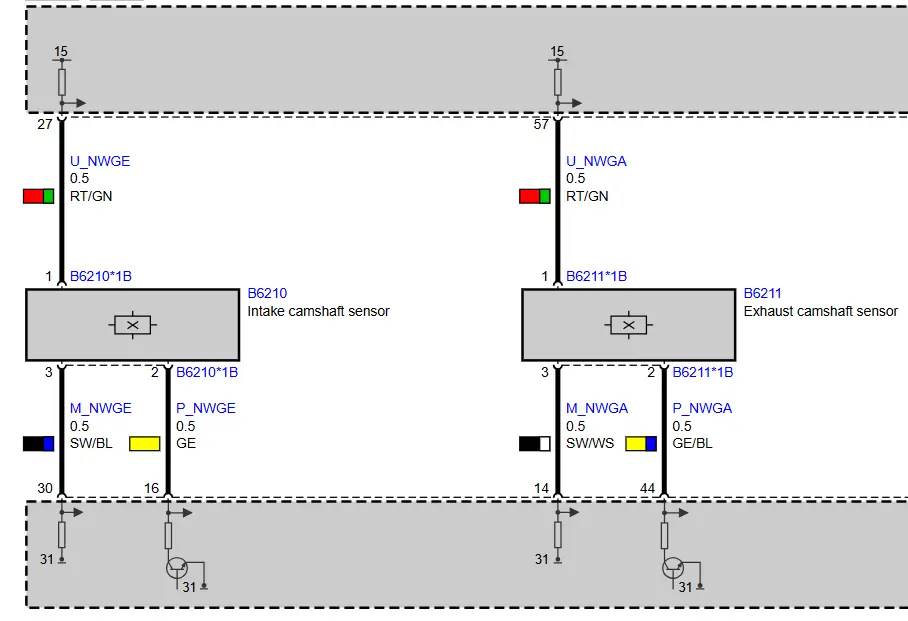
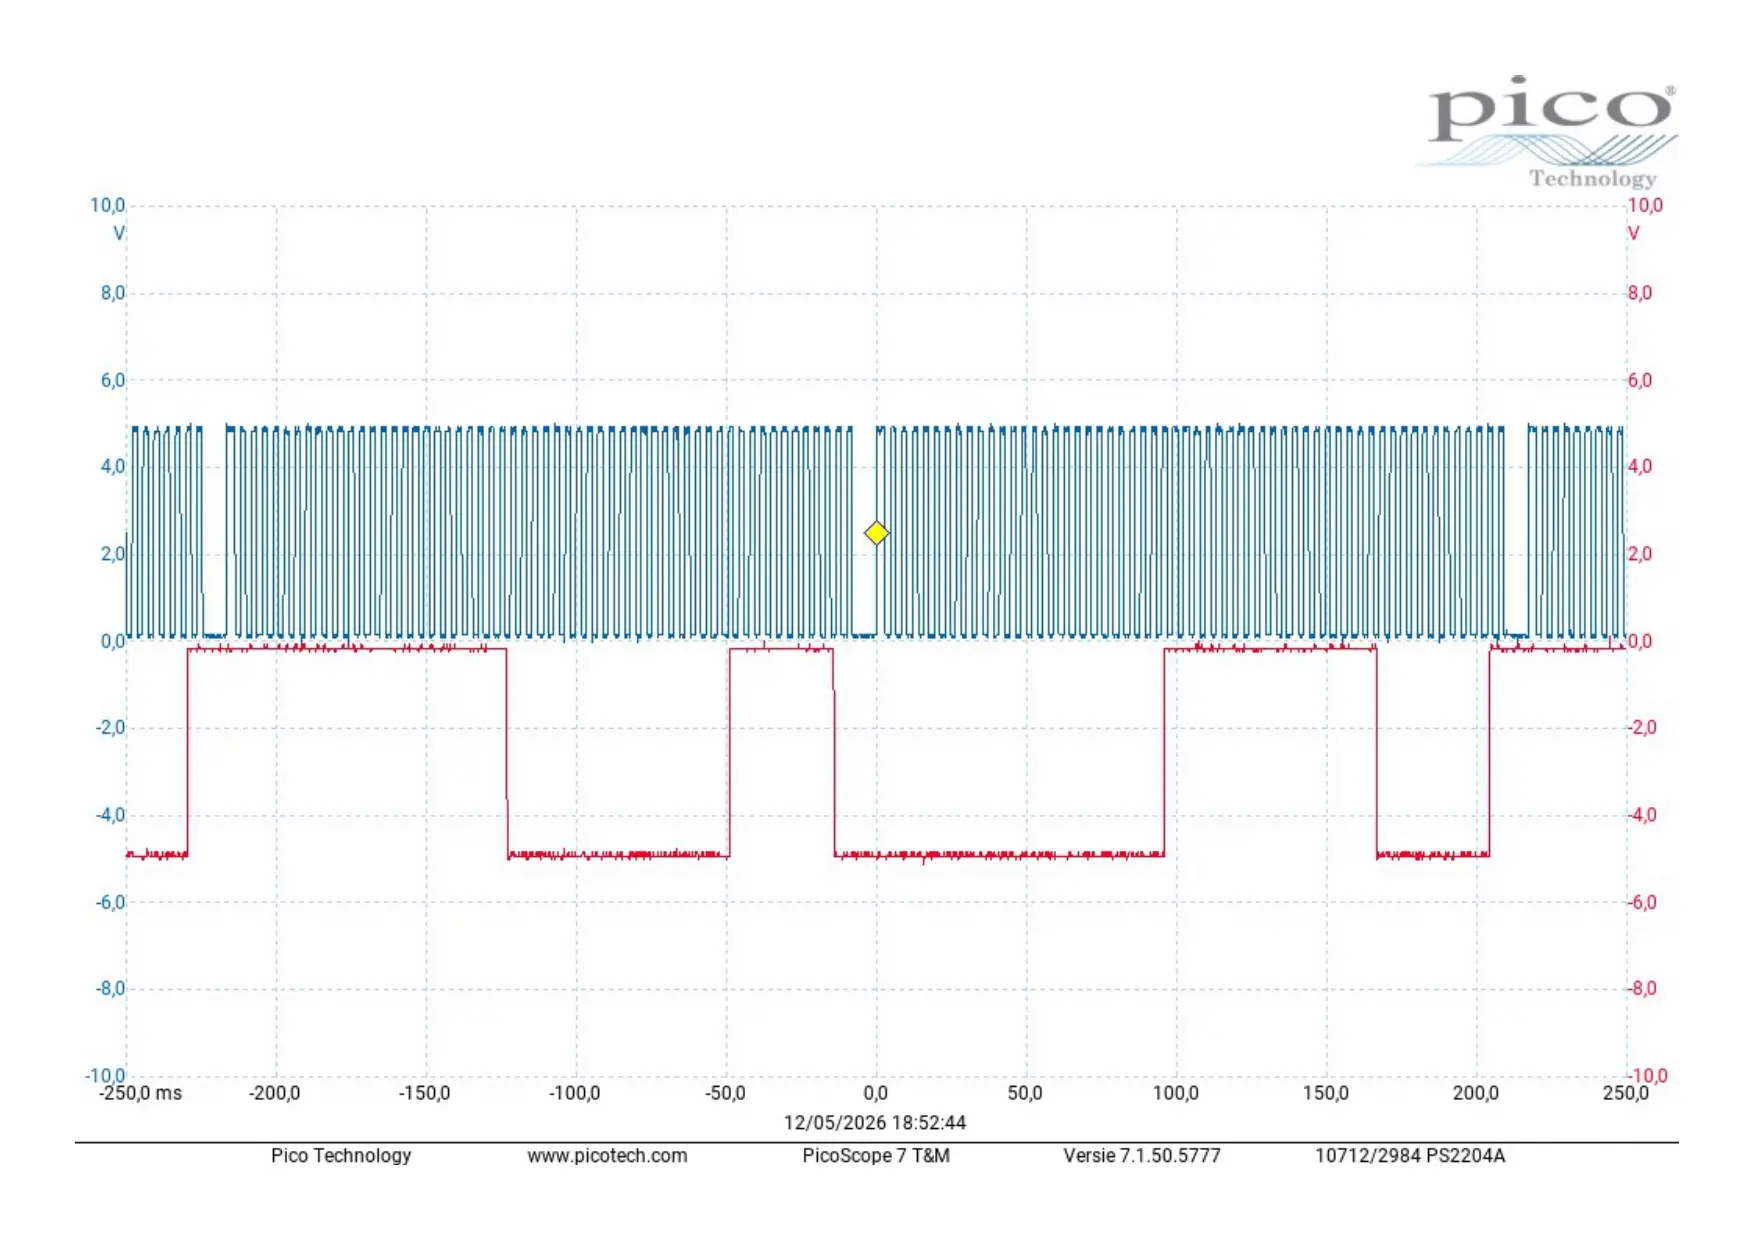
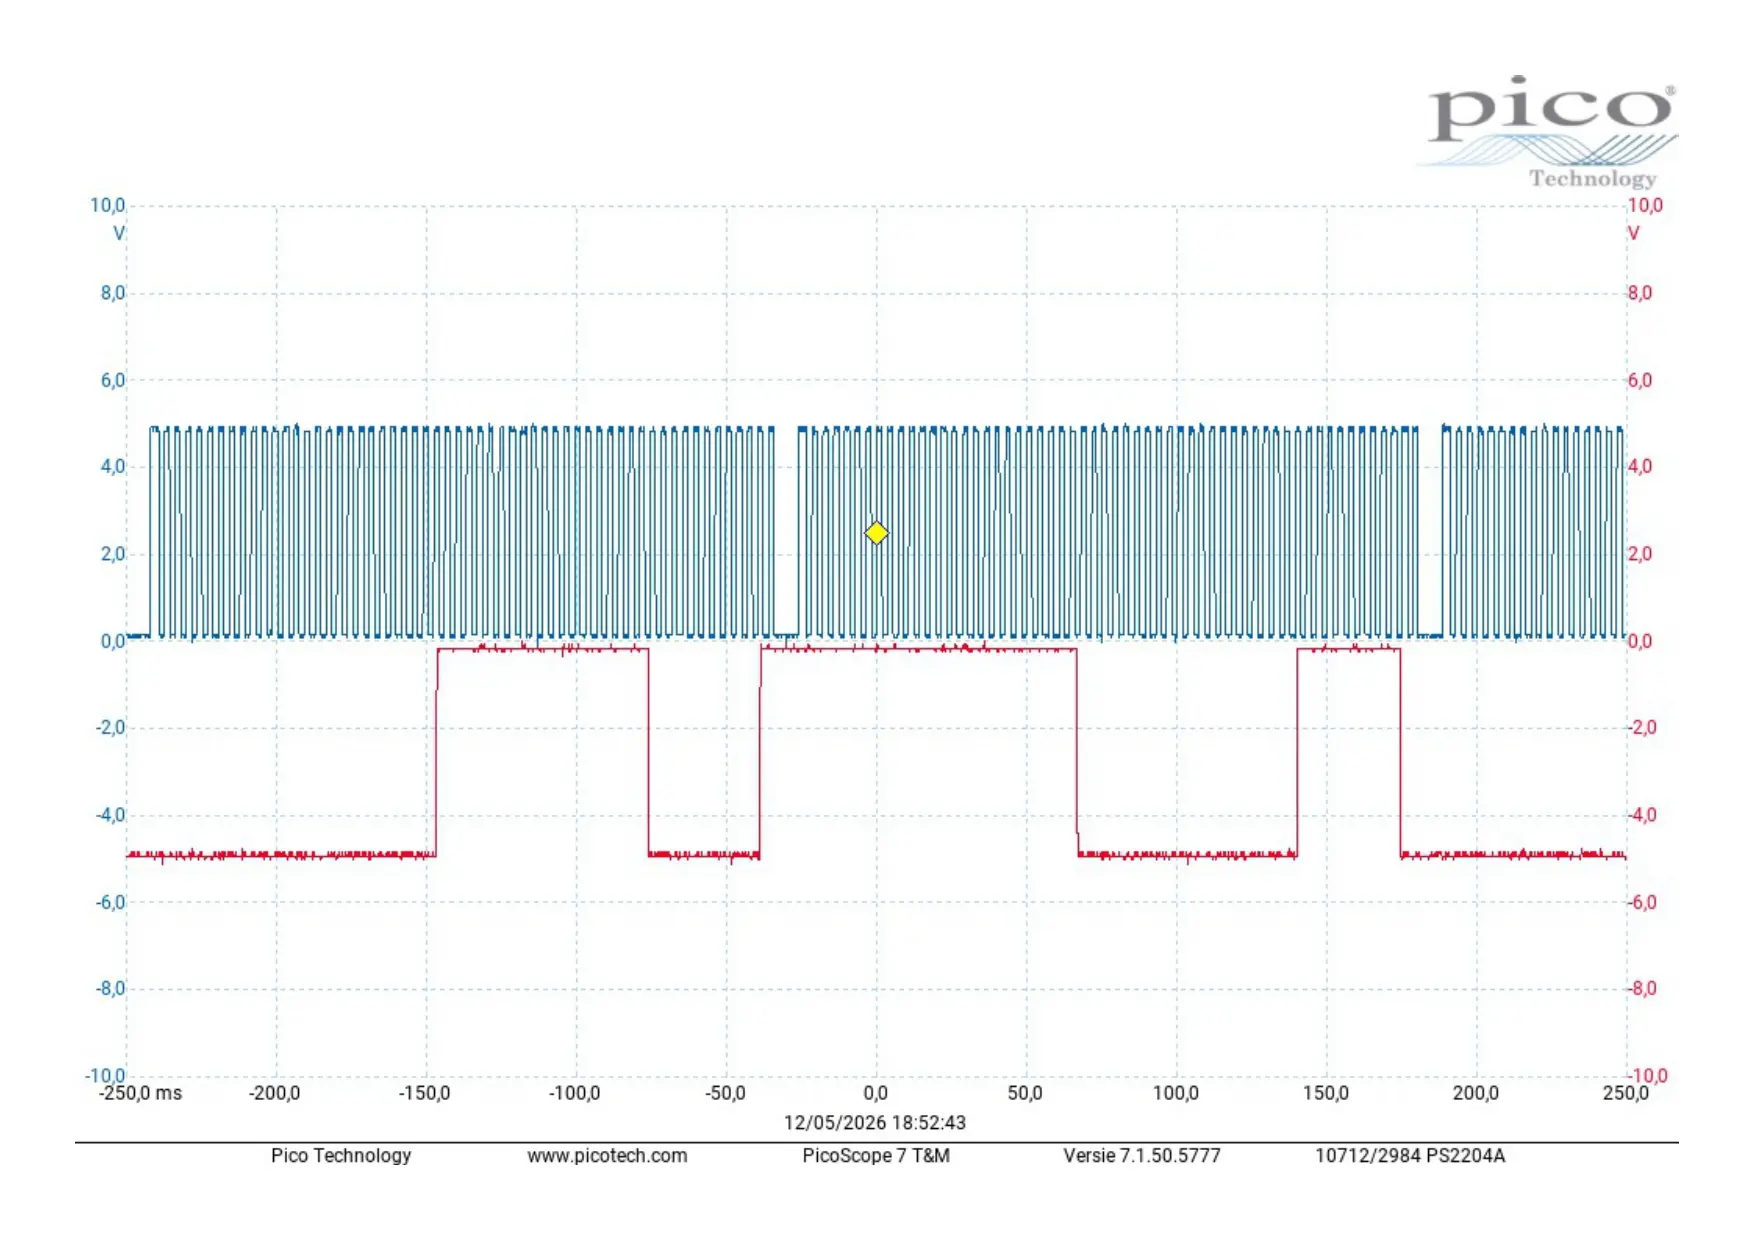
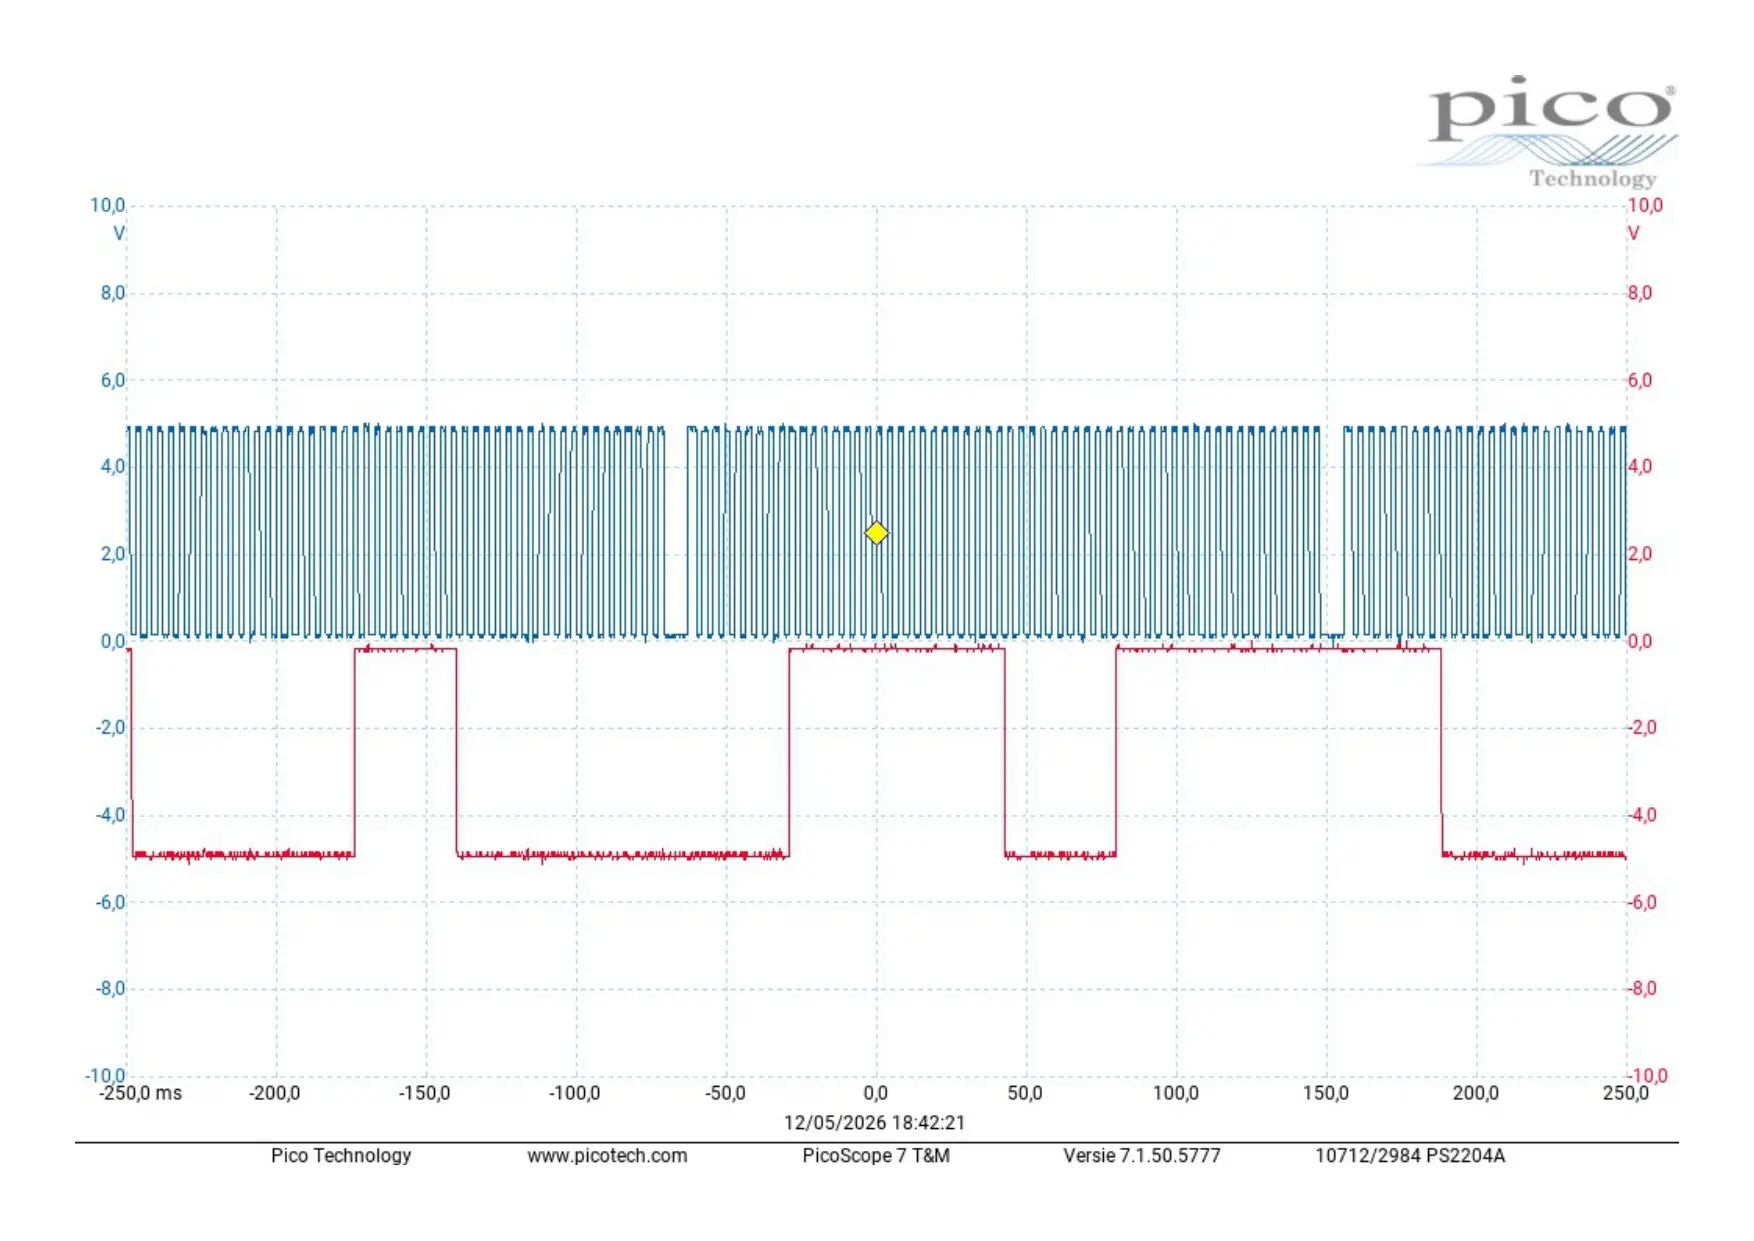
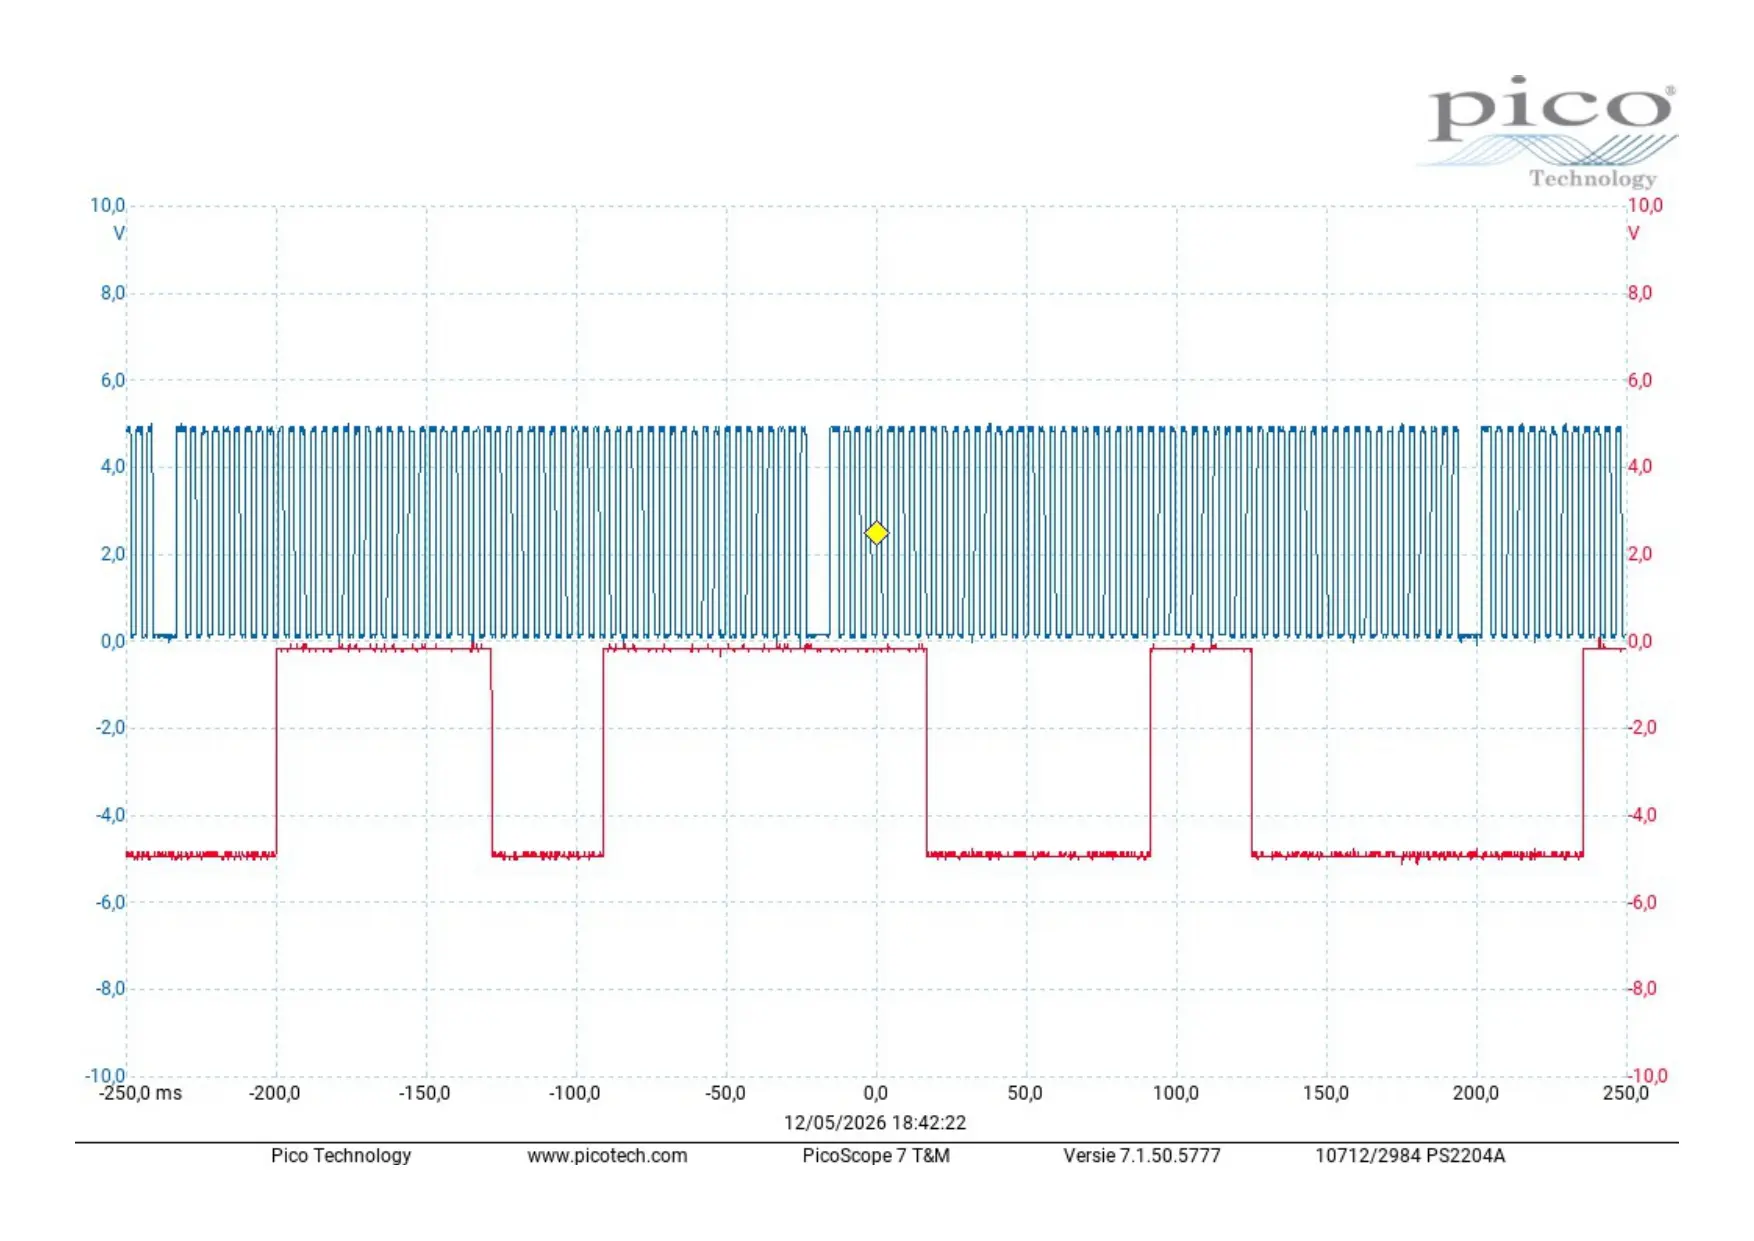
We then used the oscilloscope to compare the signals of the camshaft sensors and the crankshaft sensor with each other during cranking, not under dynamic load.
That kind of measurement is useful to check whether sensors give a logical signal, whether correlation deviations are visible and whether there is clearly an electrical problem at play. But here too you have to be honest: not every scope measurement automatically yields a conclusive answer.
We looked at the signals of both the intake and exhaust camshaft relative to the crankshaft. This did not reveal any immediately obvious electronic defect that could explain the entire fault pattern on its own.
You can then go further with extra dynamic measurements, even more live data and even more analysis of angular displacement. But in practice ISTA already knew at that point that the intake VANOS control was not reaching its test target.
The question then becomes: do you invest a lot more time in a measurement that may not give a much clearer conclusion, or do you take the next logical mechanical step?
That is why we also replaced the VANOS sprockets
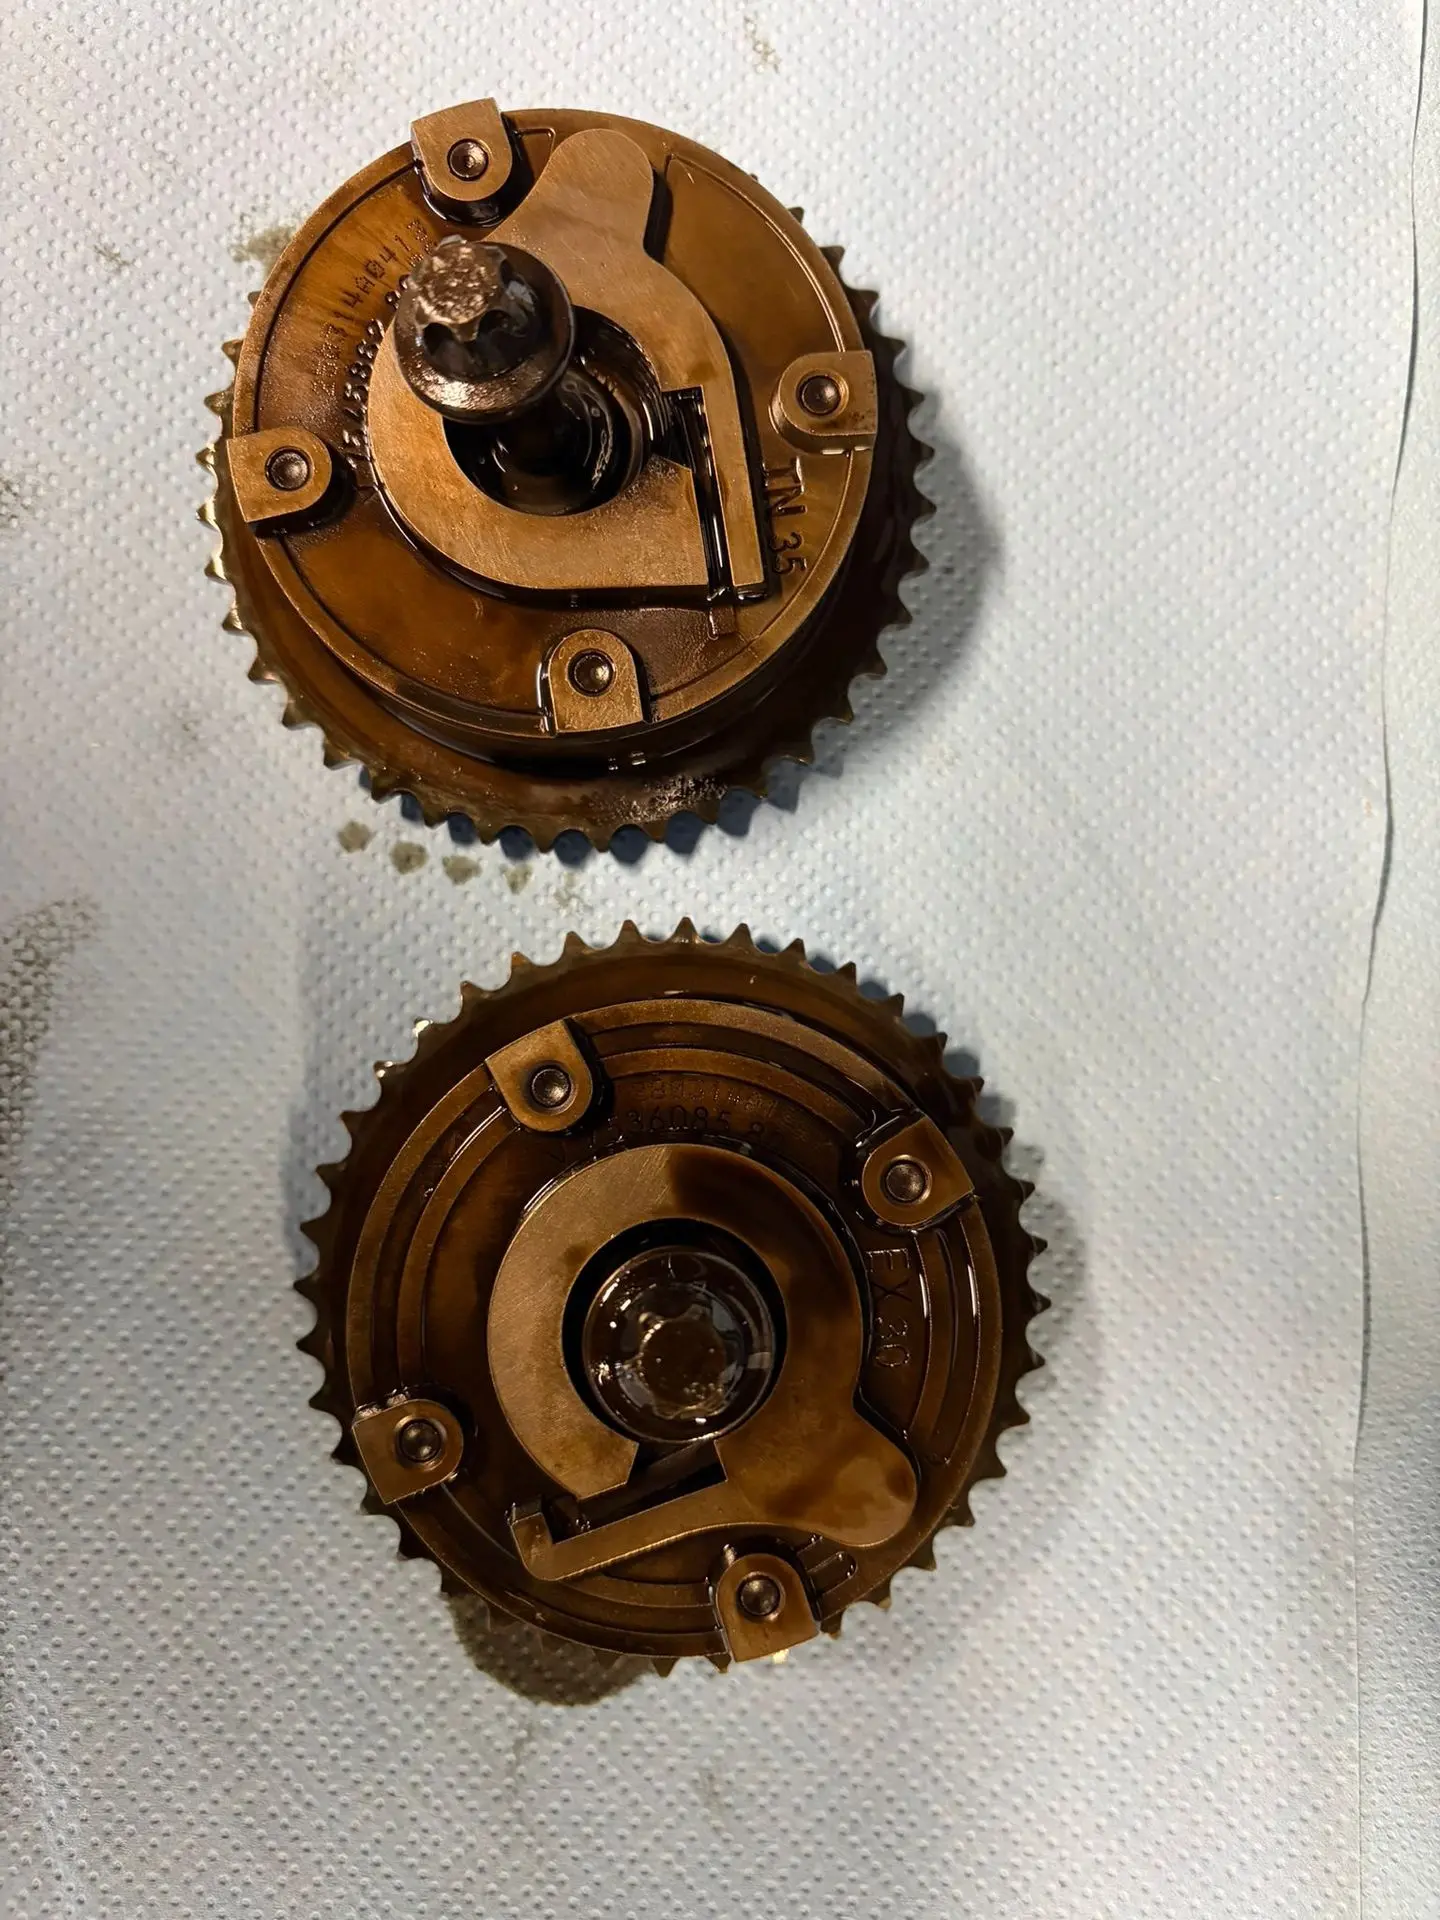
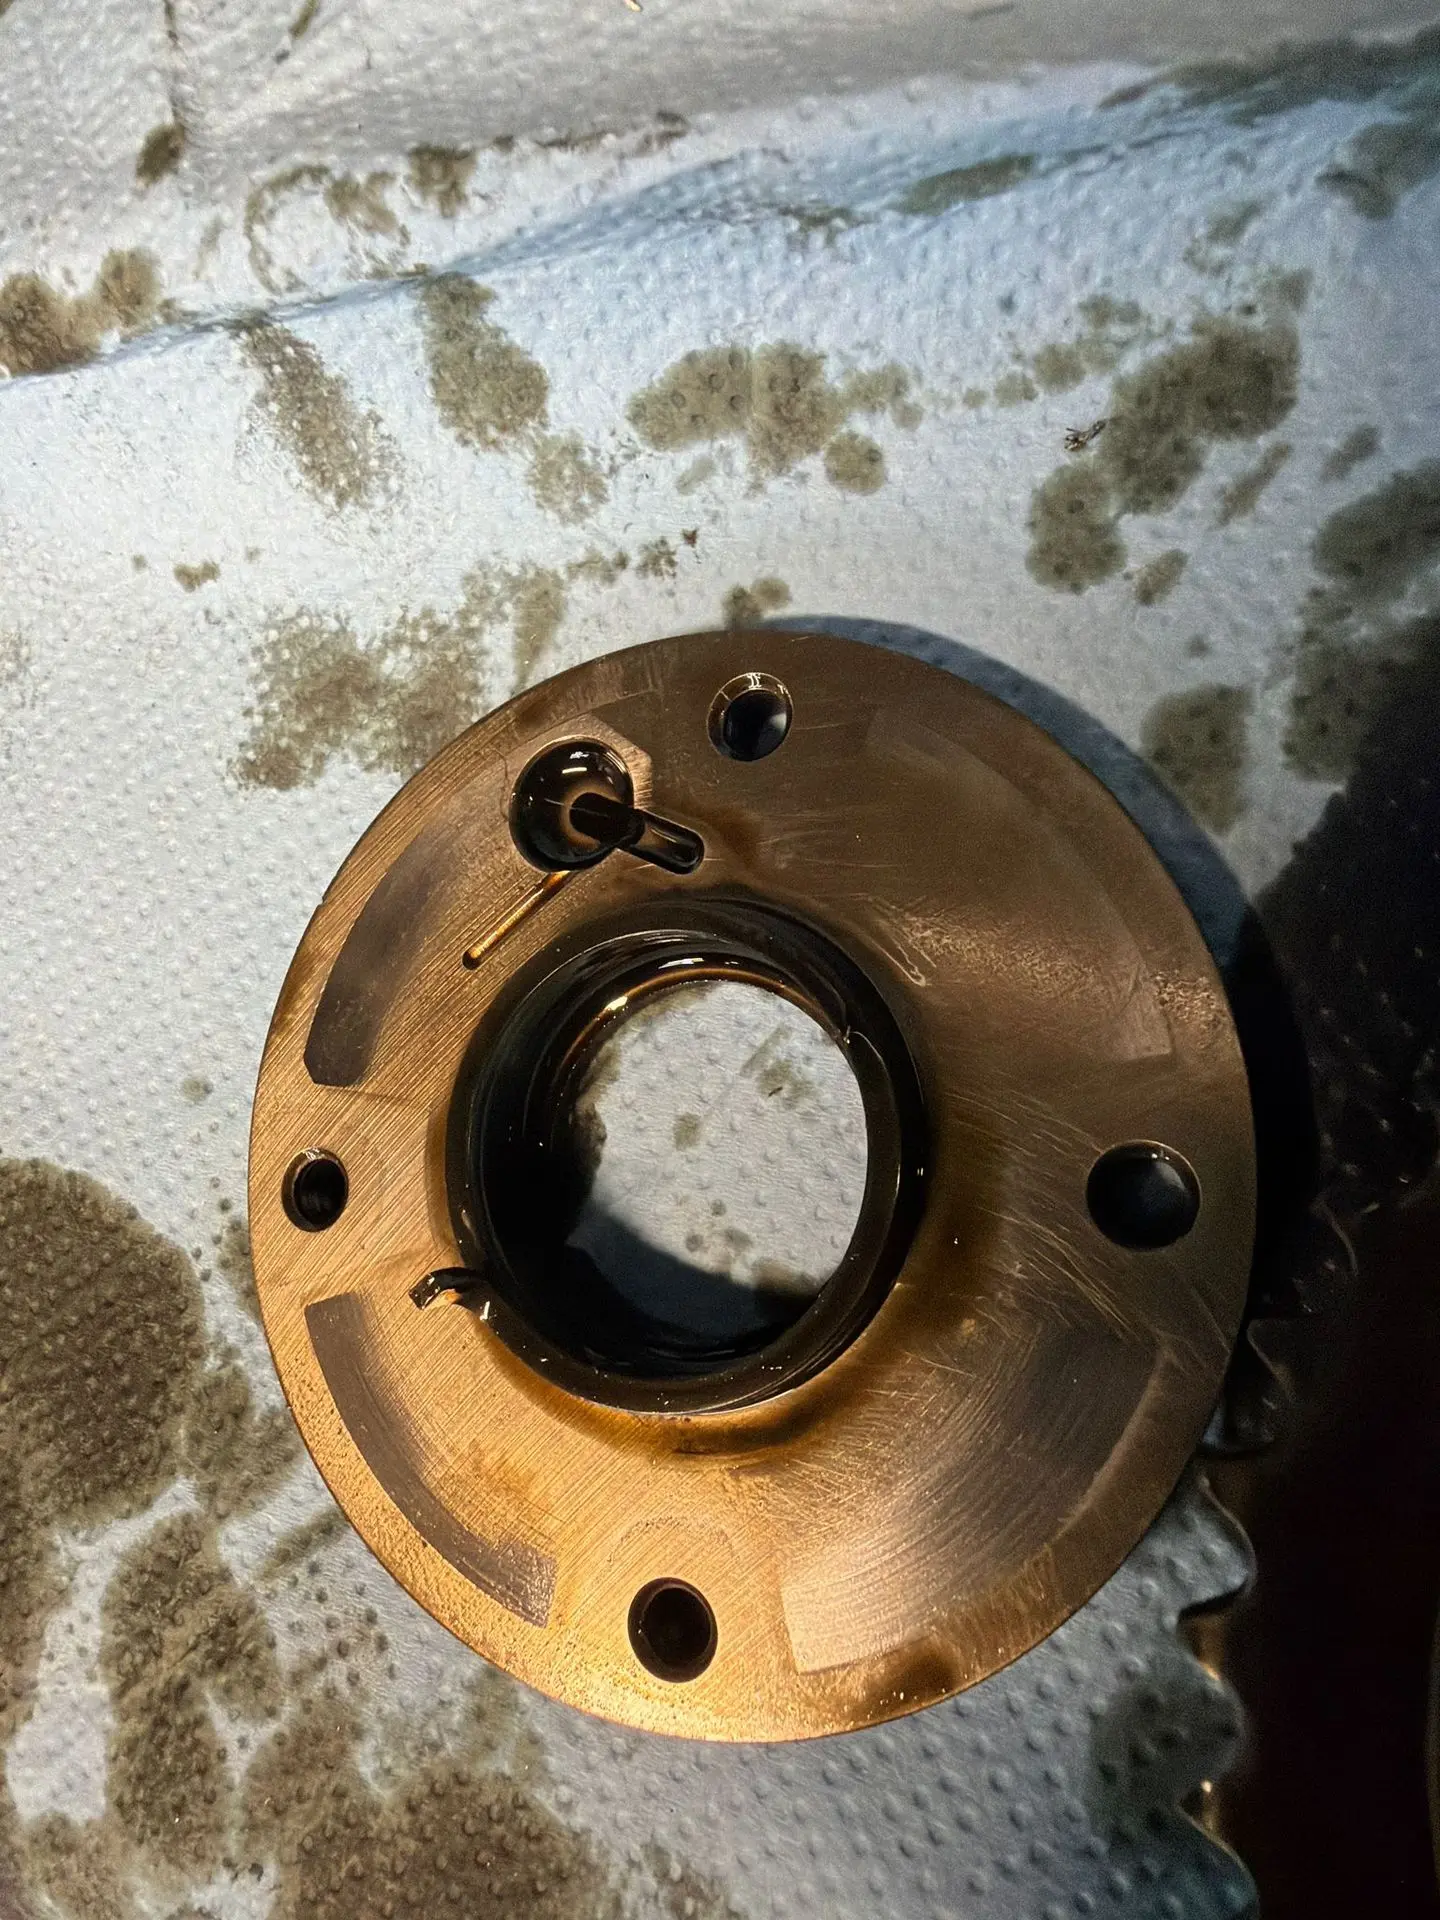
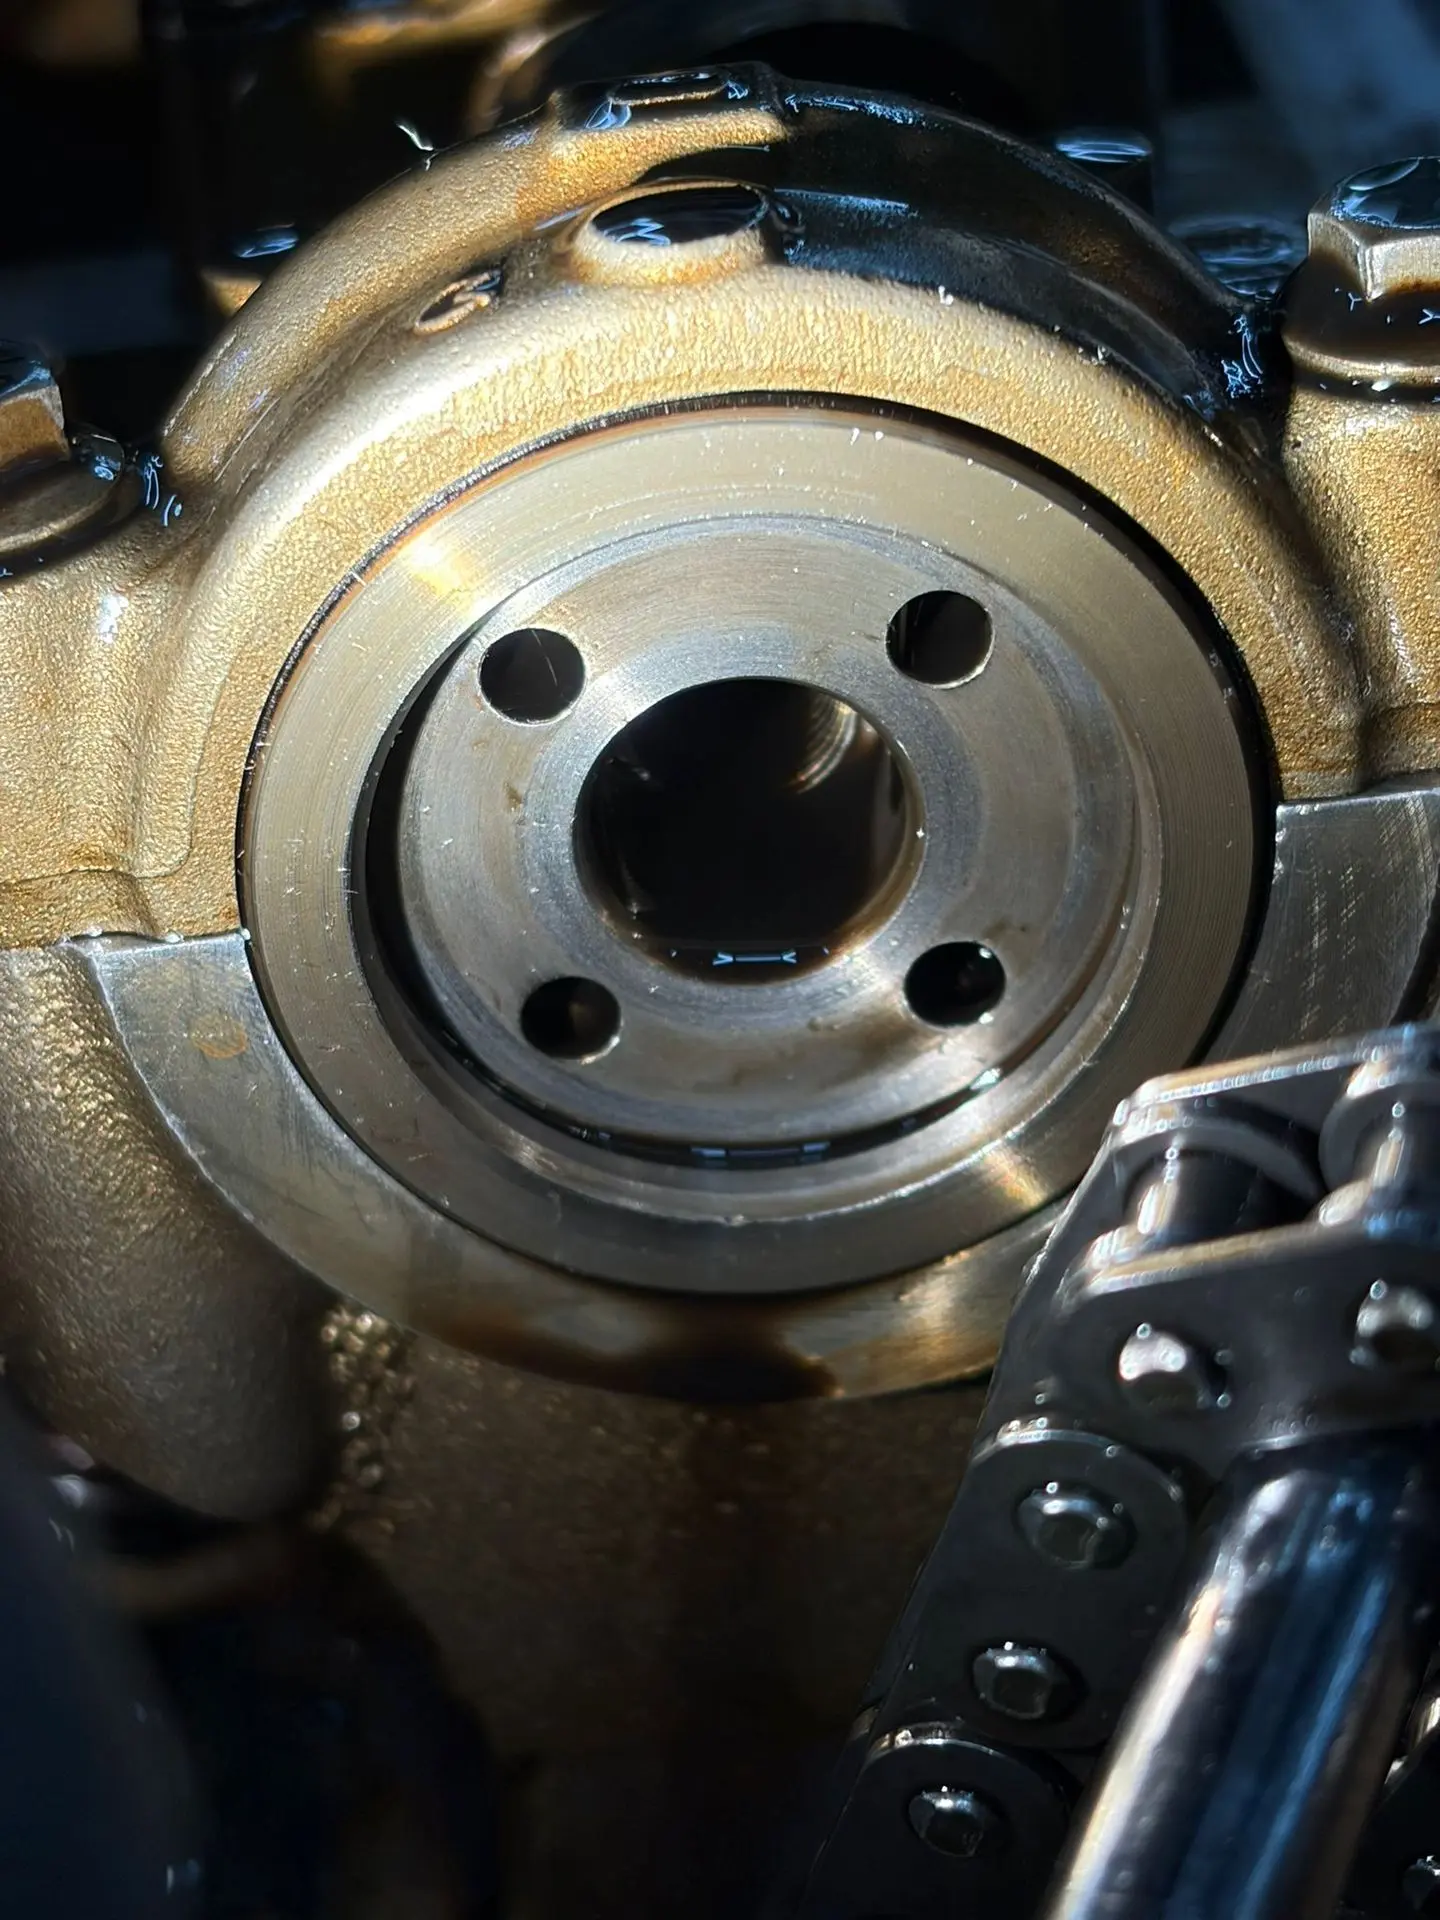
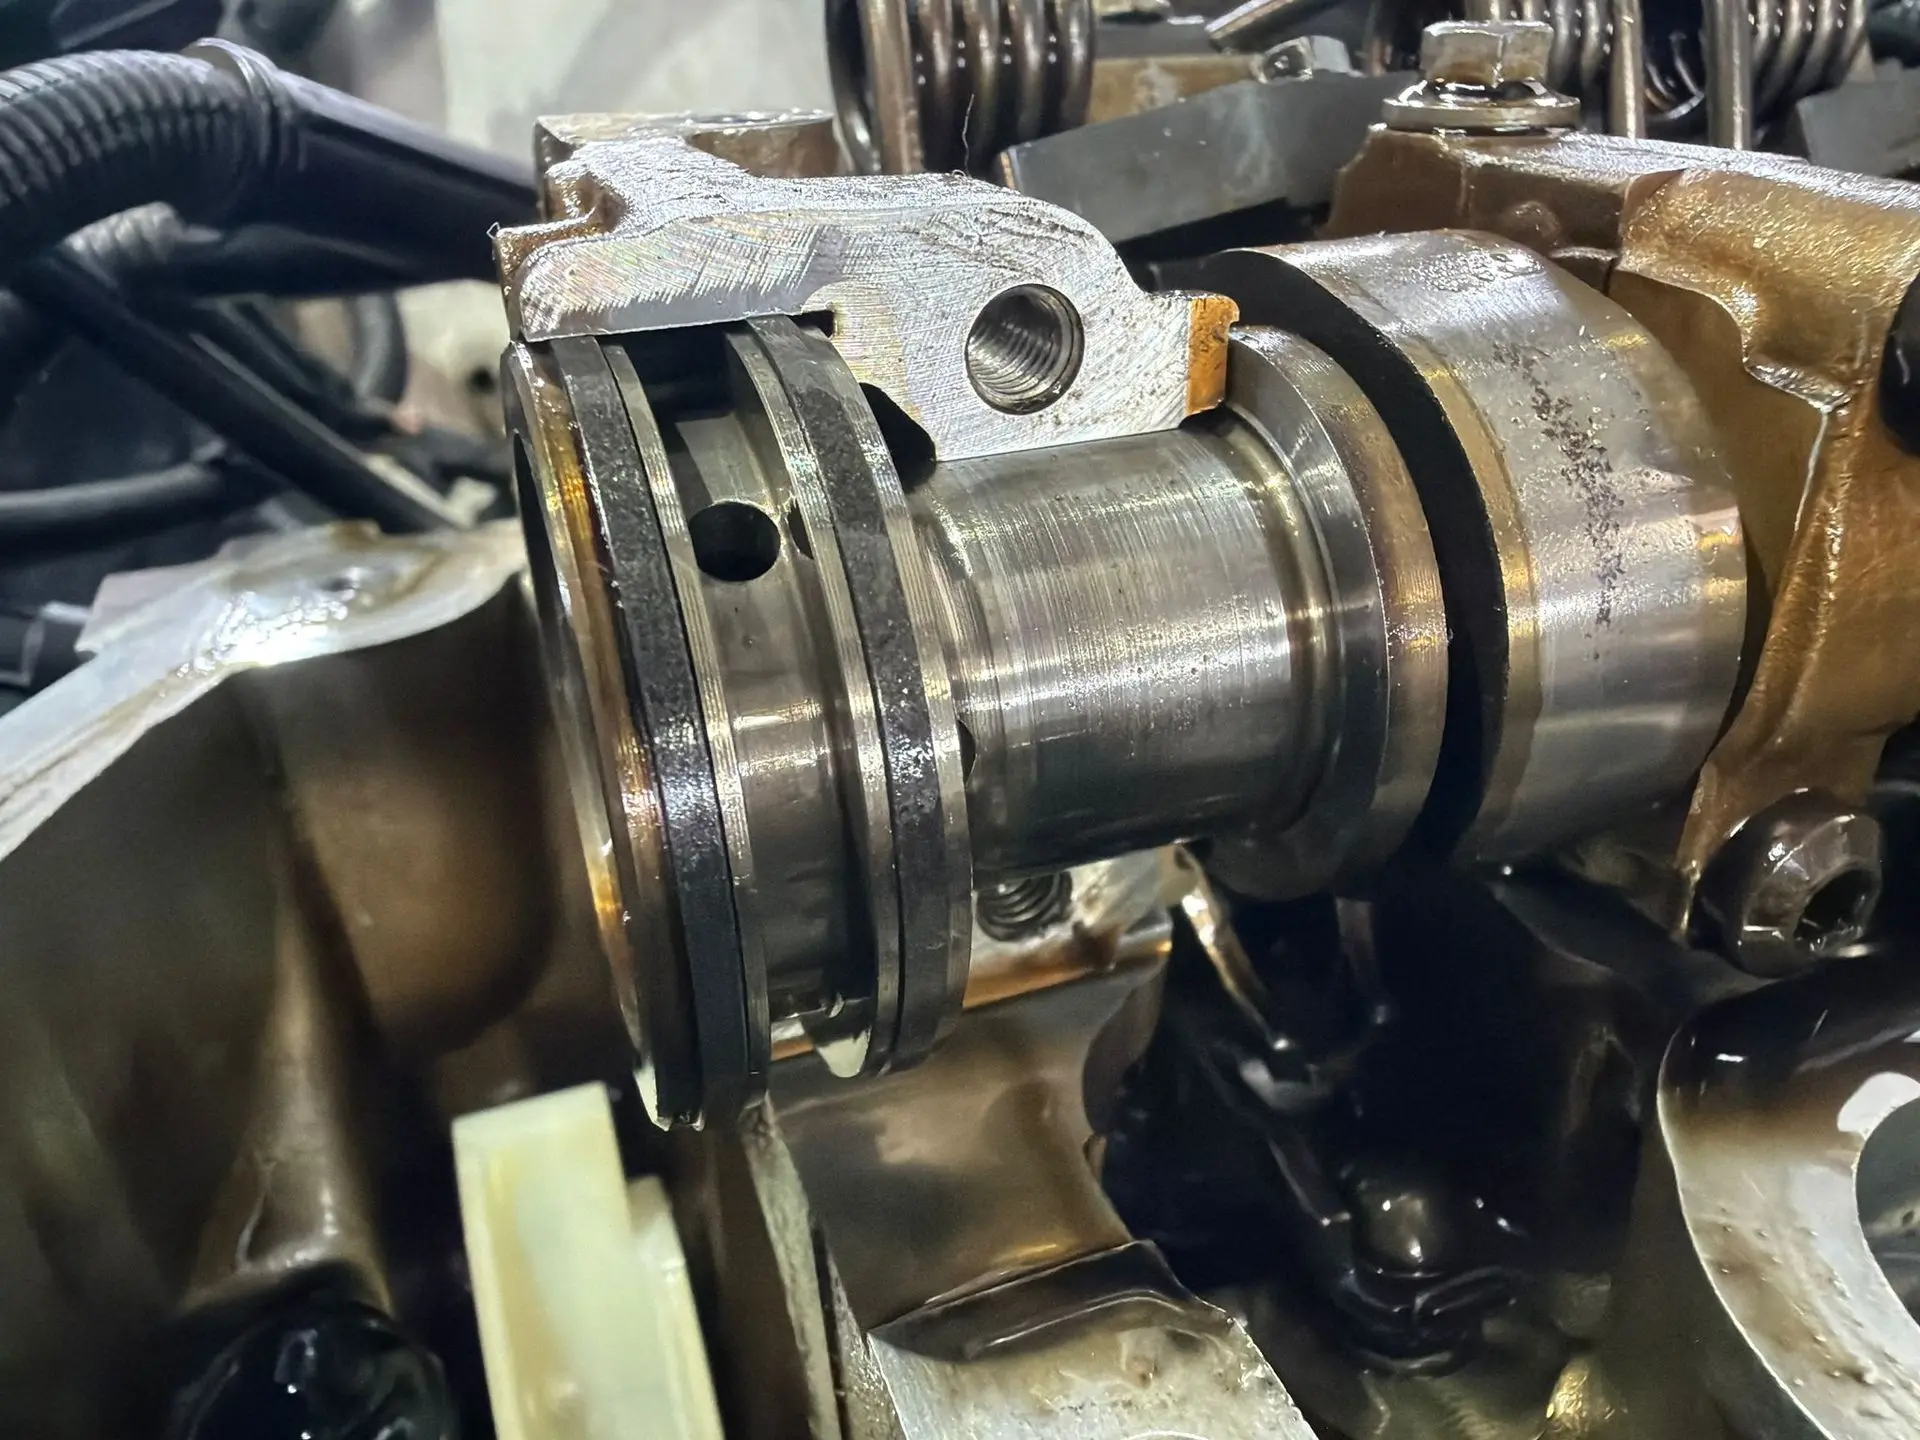
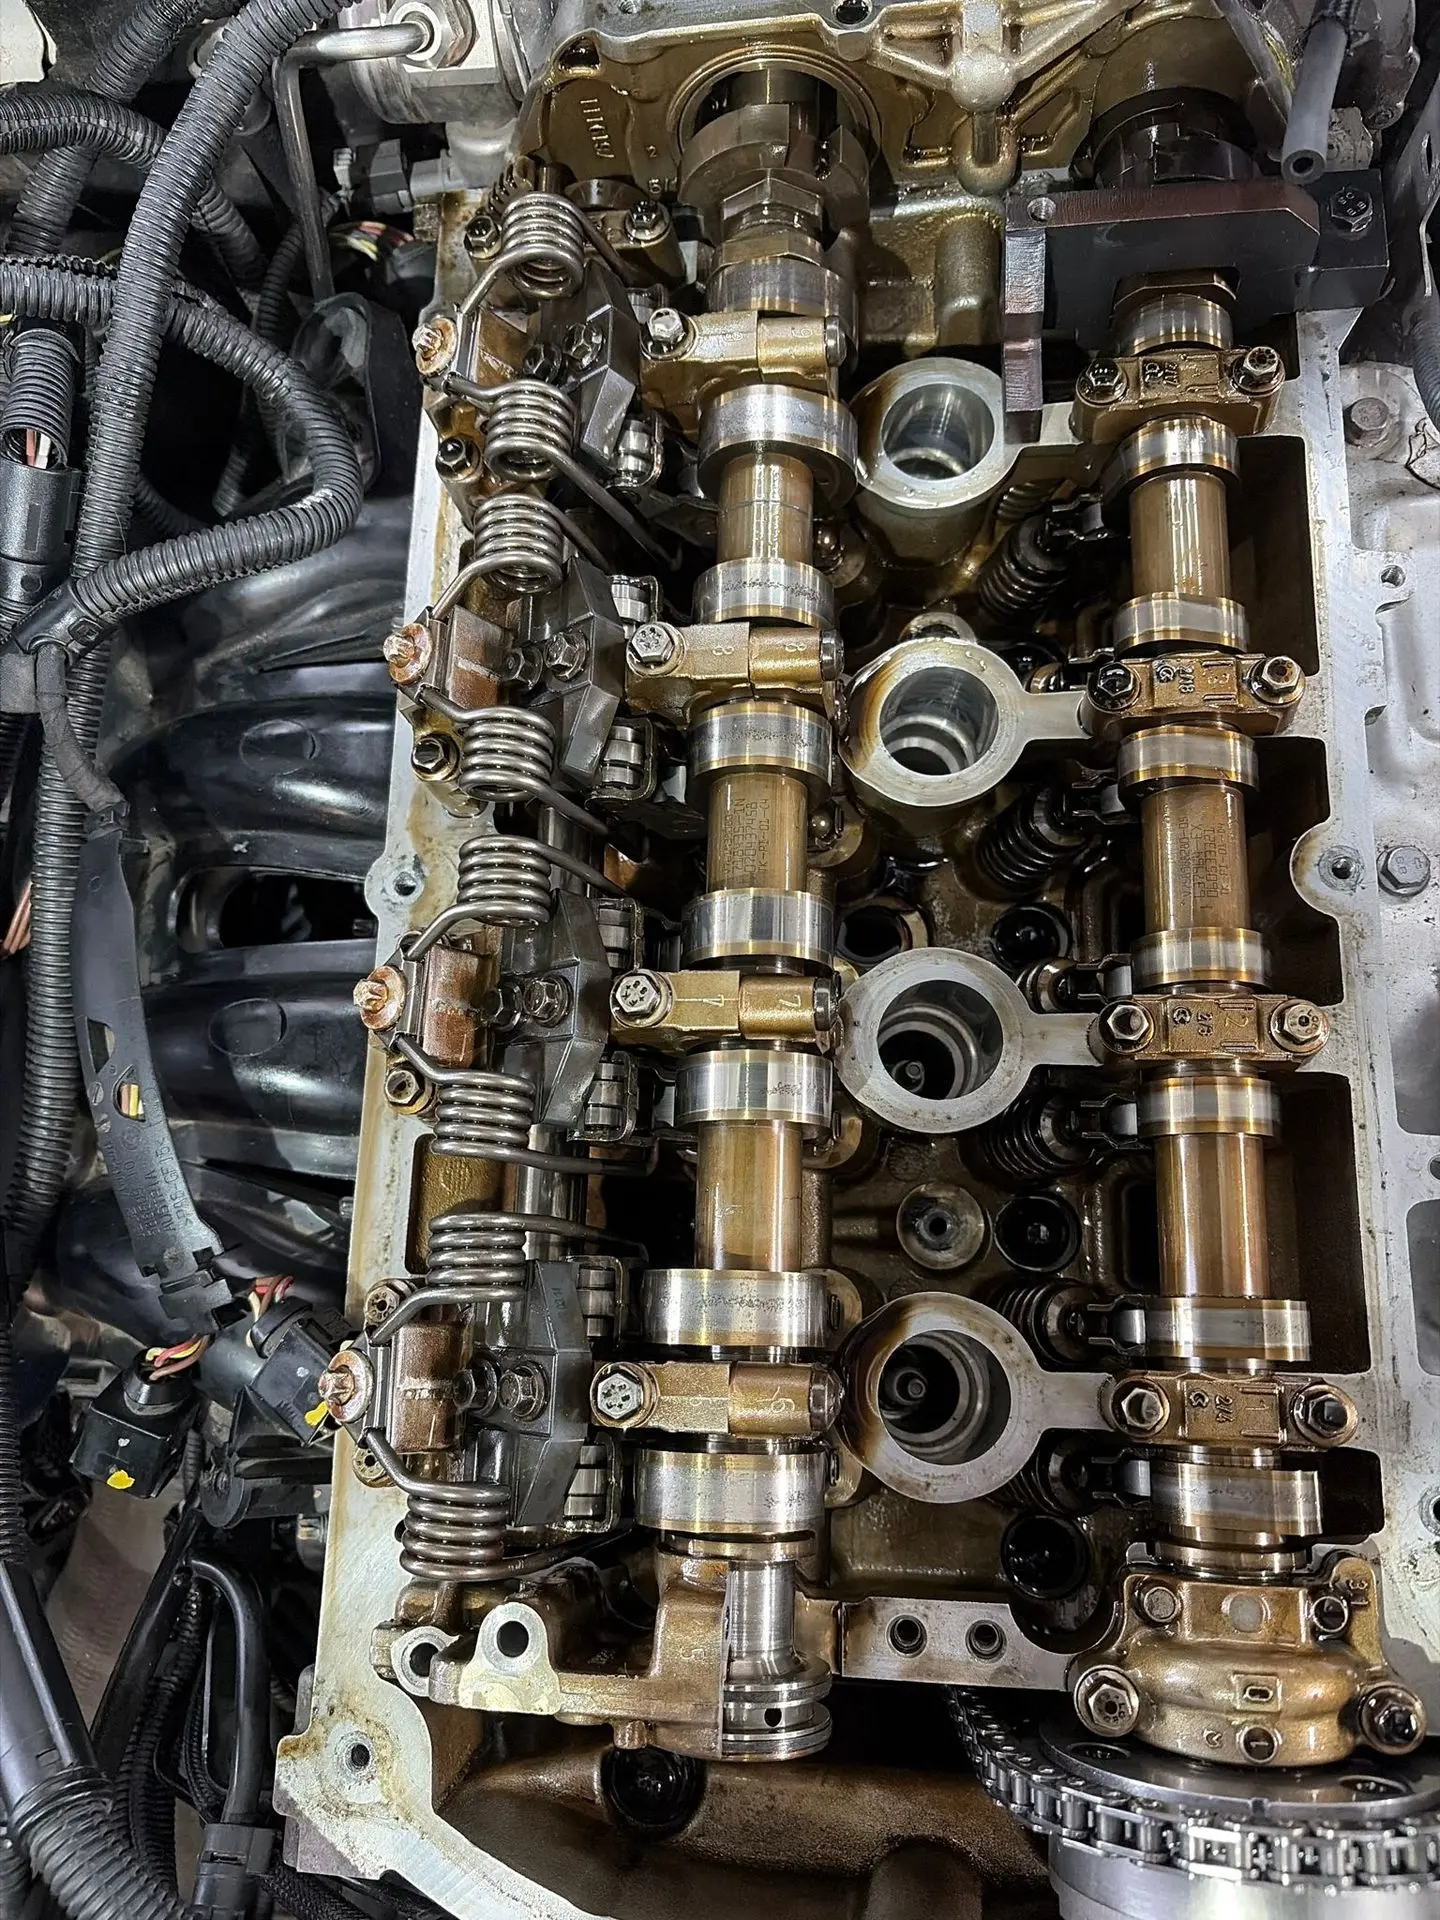
Because the solenoids had already been replaced and the intake side remained suspect, we moved on to the VANOS sprockets themselves. These are in fact 2 rings that lock into each other when you start the car and there is no oil pressure yet. As soon as there is oil pressure, the pin opens the passage to the 2 internal rings and the camshaft is controlled via oil pressure. That is how the ECU can regulate the camshaft timing, or VANOS as BMW calls it.
Here too we did not opt for half measures. We replaced both the intake and the exhaust side. The reason is simple: if you fit one side new and the other side remains slightly worn, that can again give correlation differences or control deviations. Then you may be creating a new gray area.
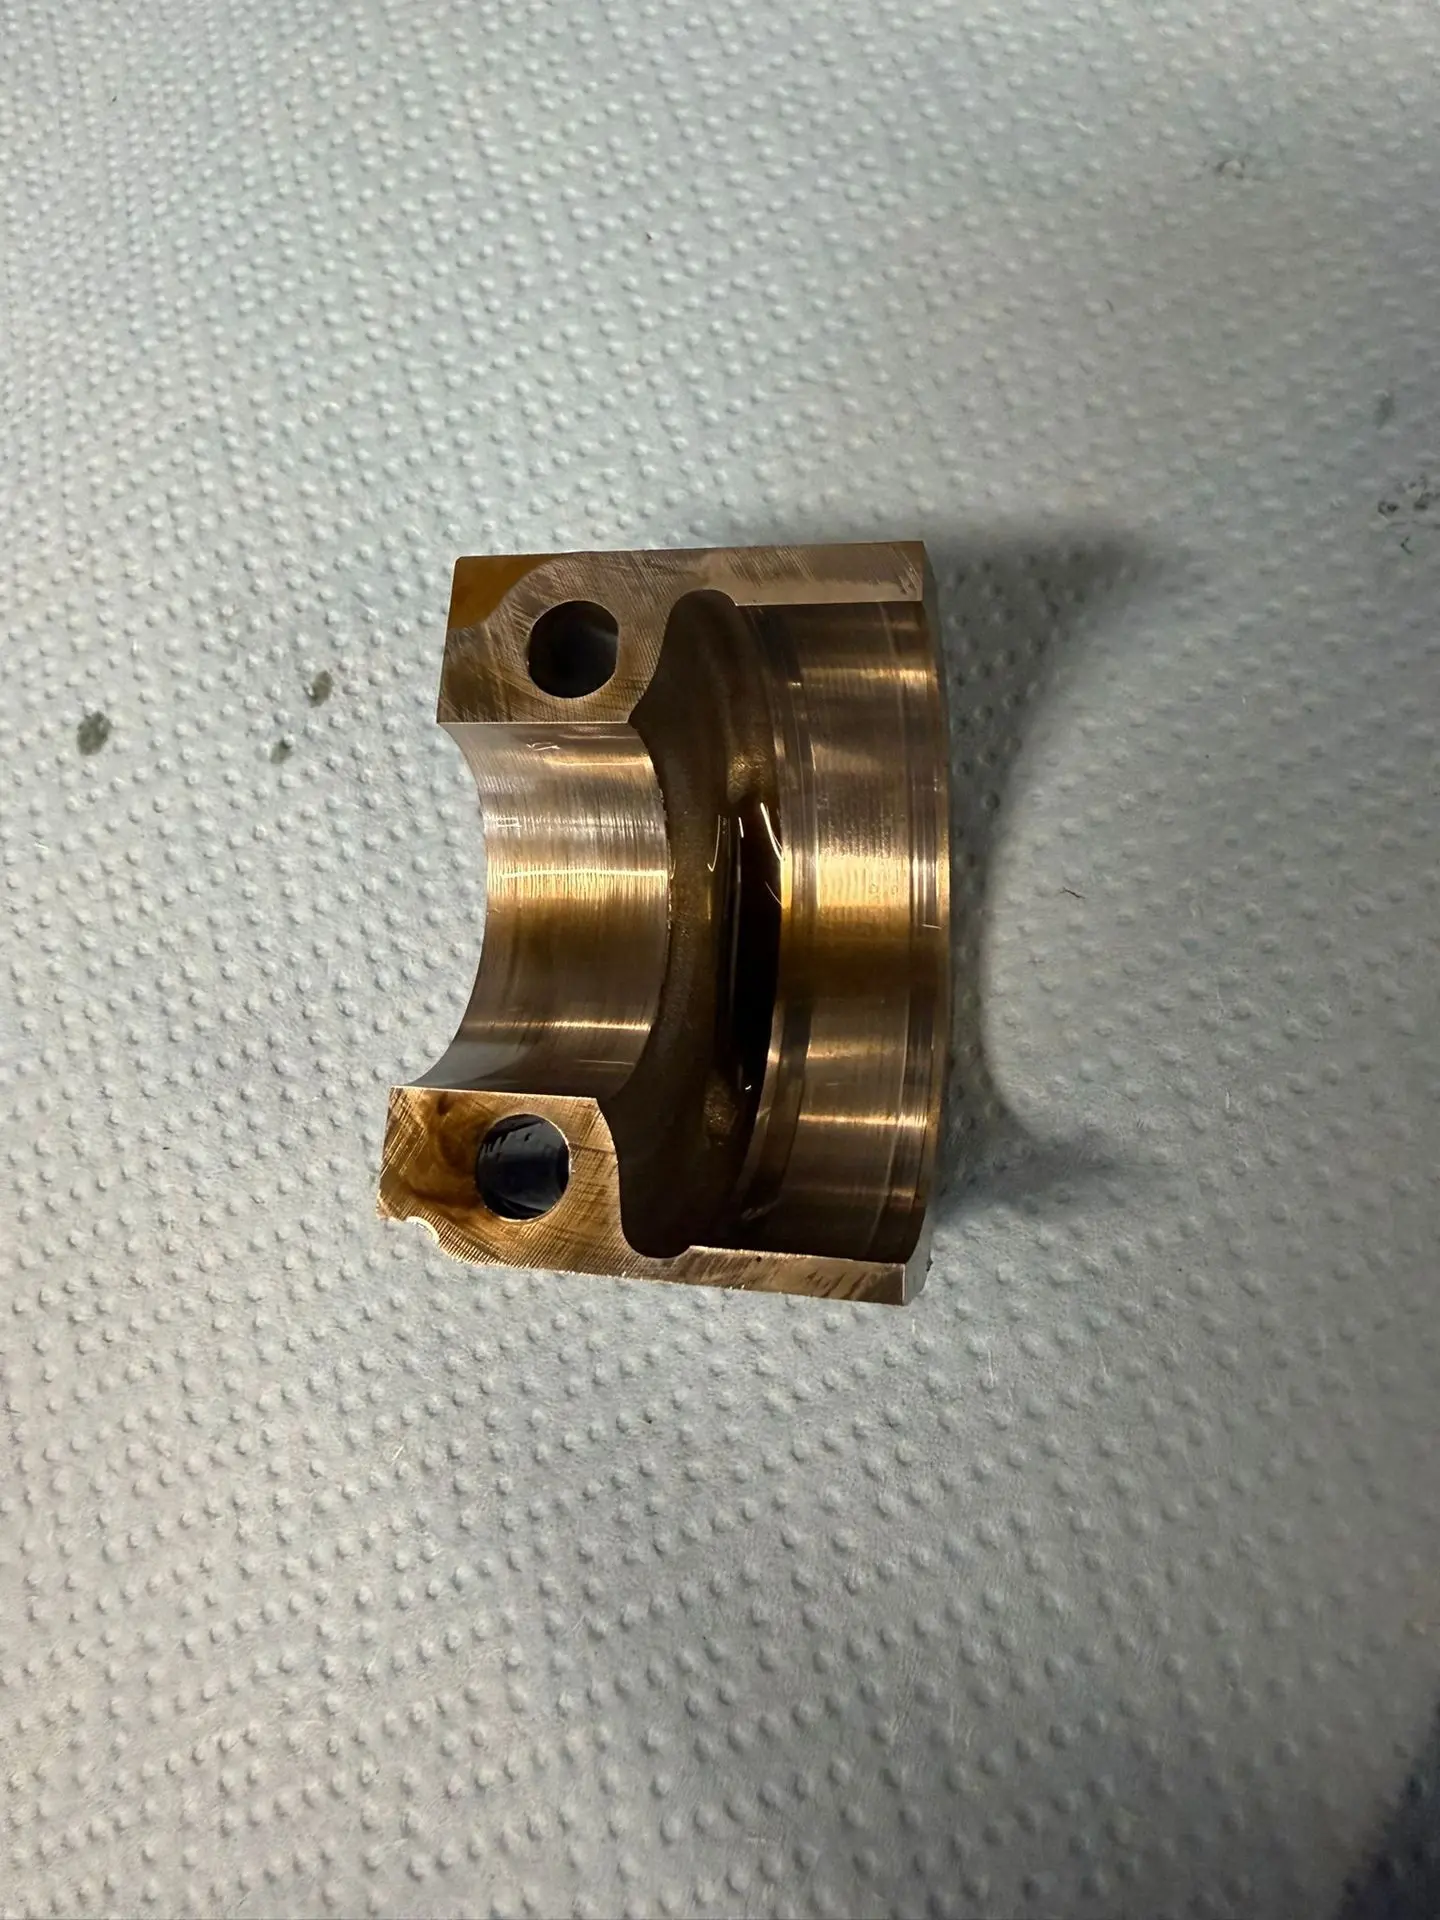
We also opened up the intake sprocket to look for a clear internal defect. There we saw light signs of use, but nothing you would without doubt call a serious defect or the decisive culprit. The locking pins also still appeared to be in acceptable condition.
That is again typical of this kind of case: you see no dramatic damage, but you do rule out a relevant possible cause.
Plastic rings and oil pressure control
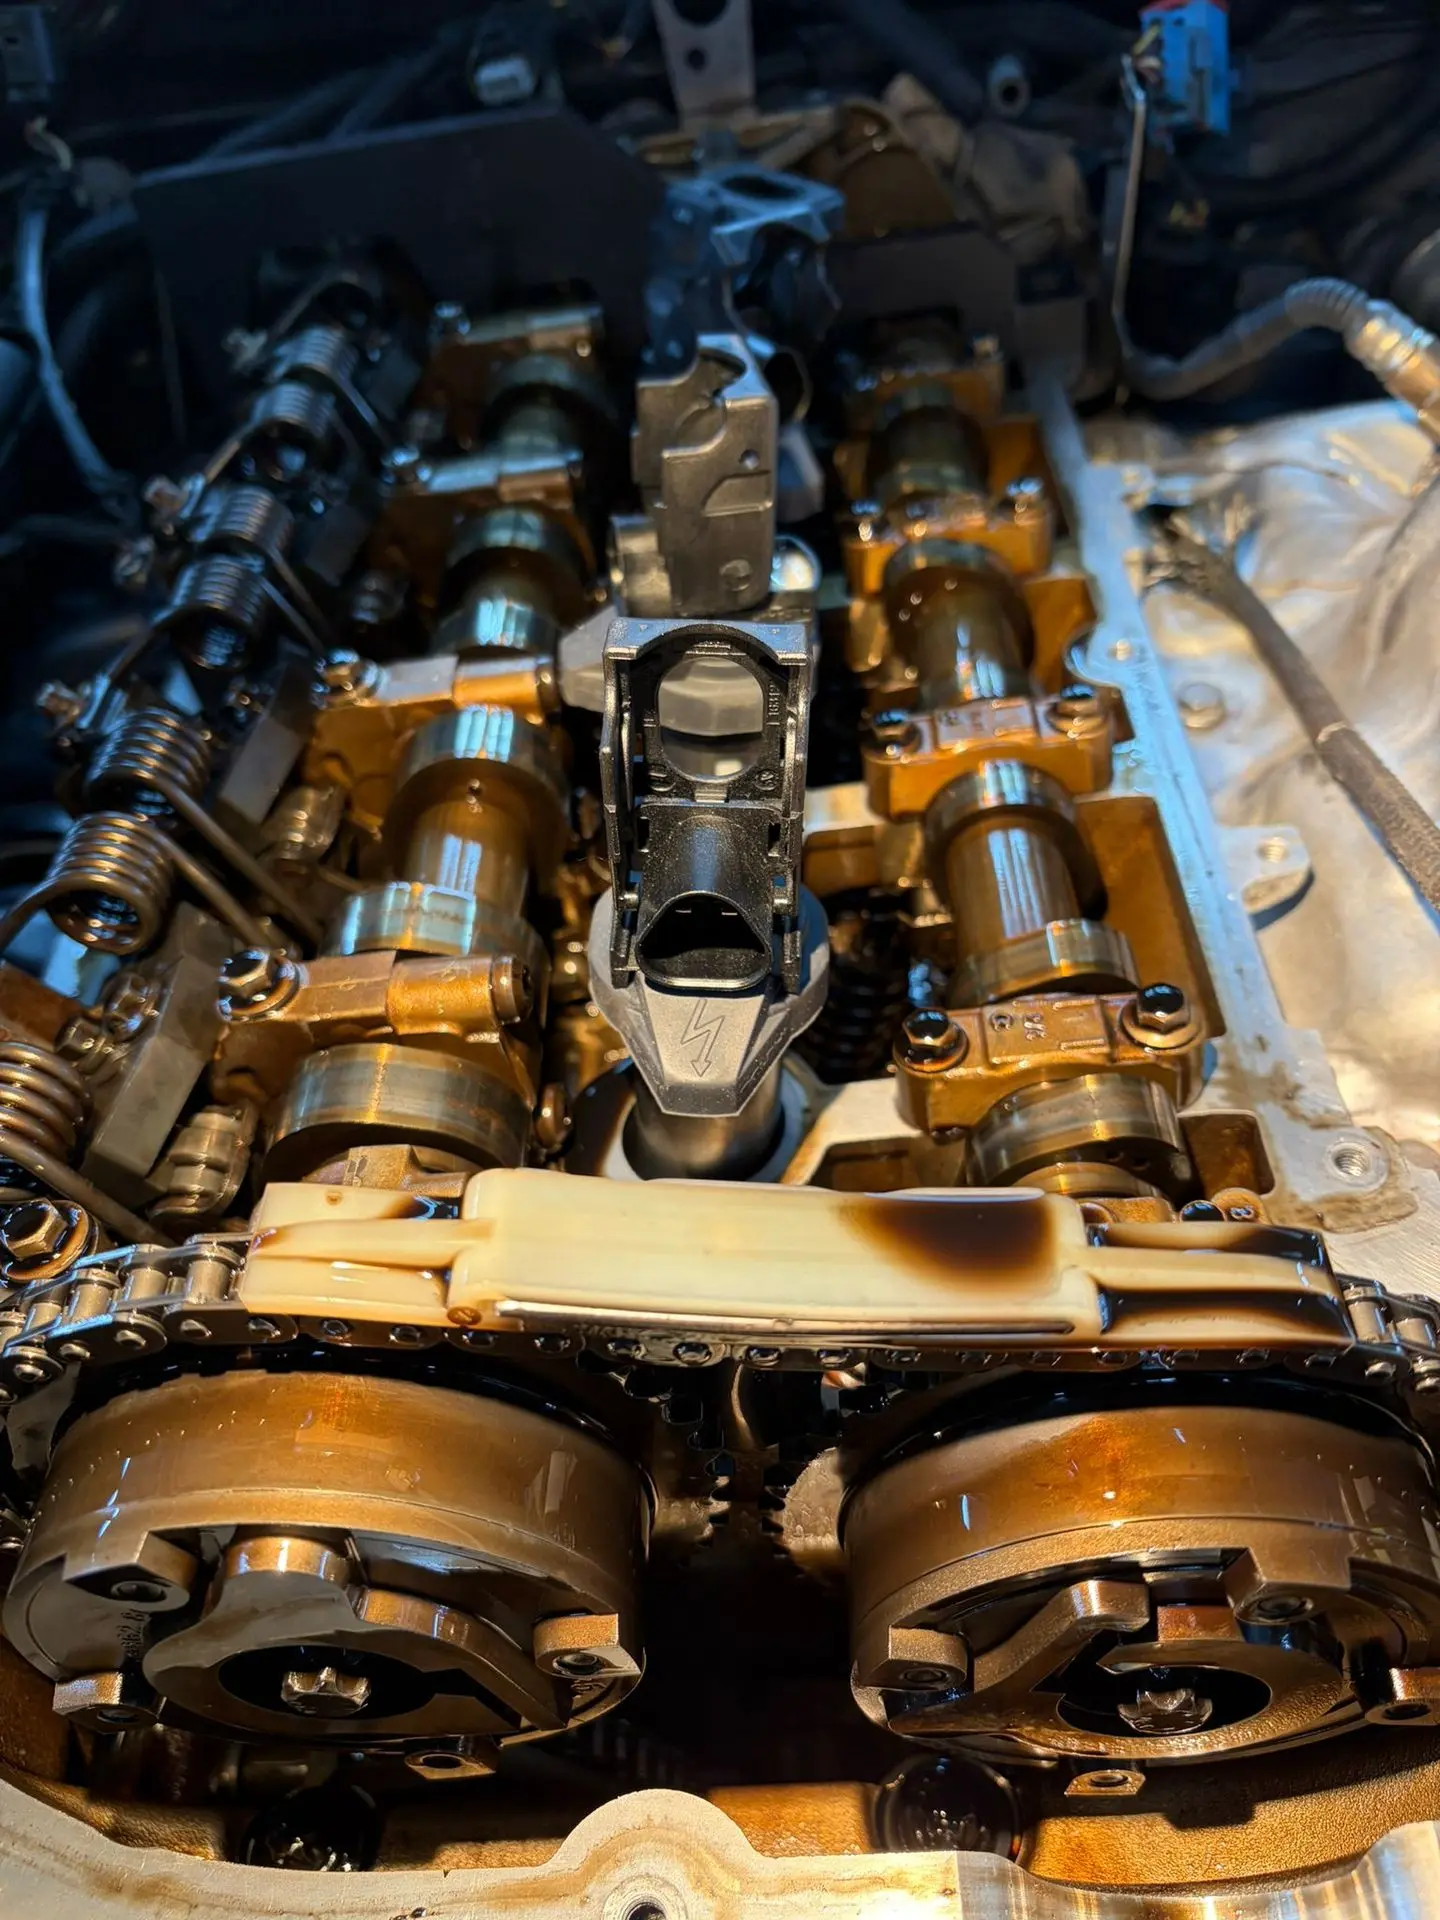
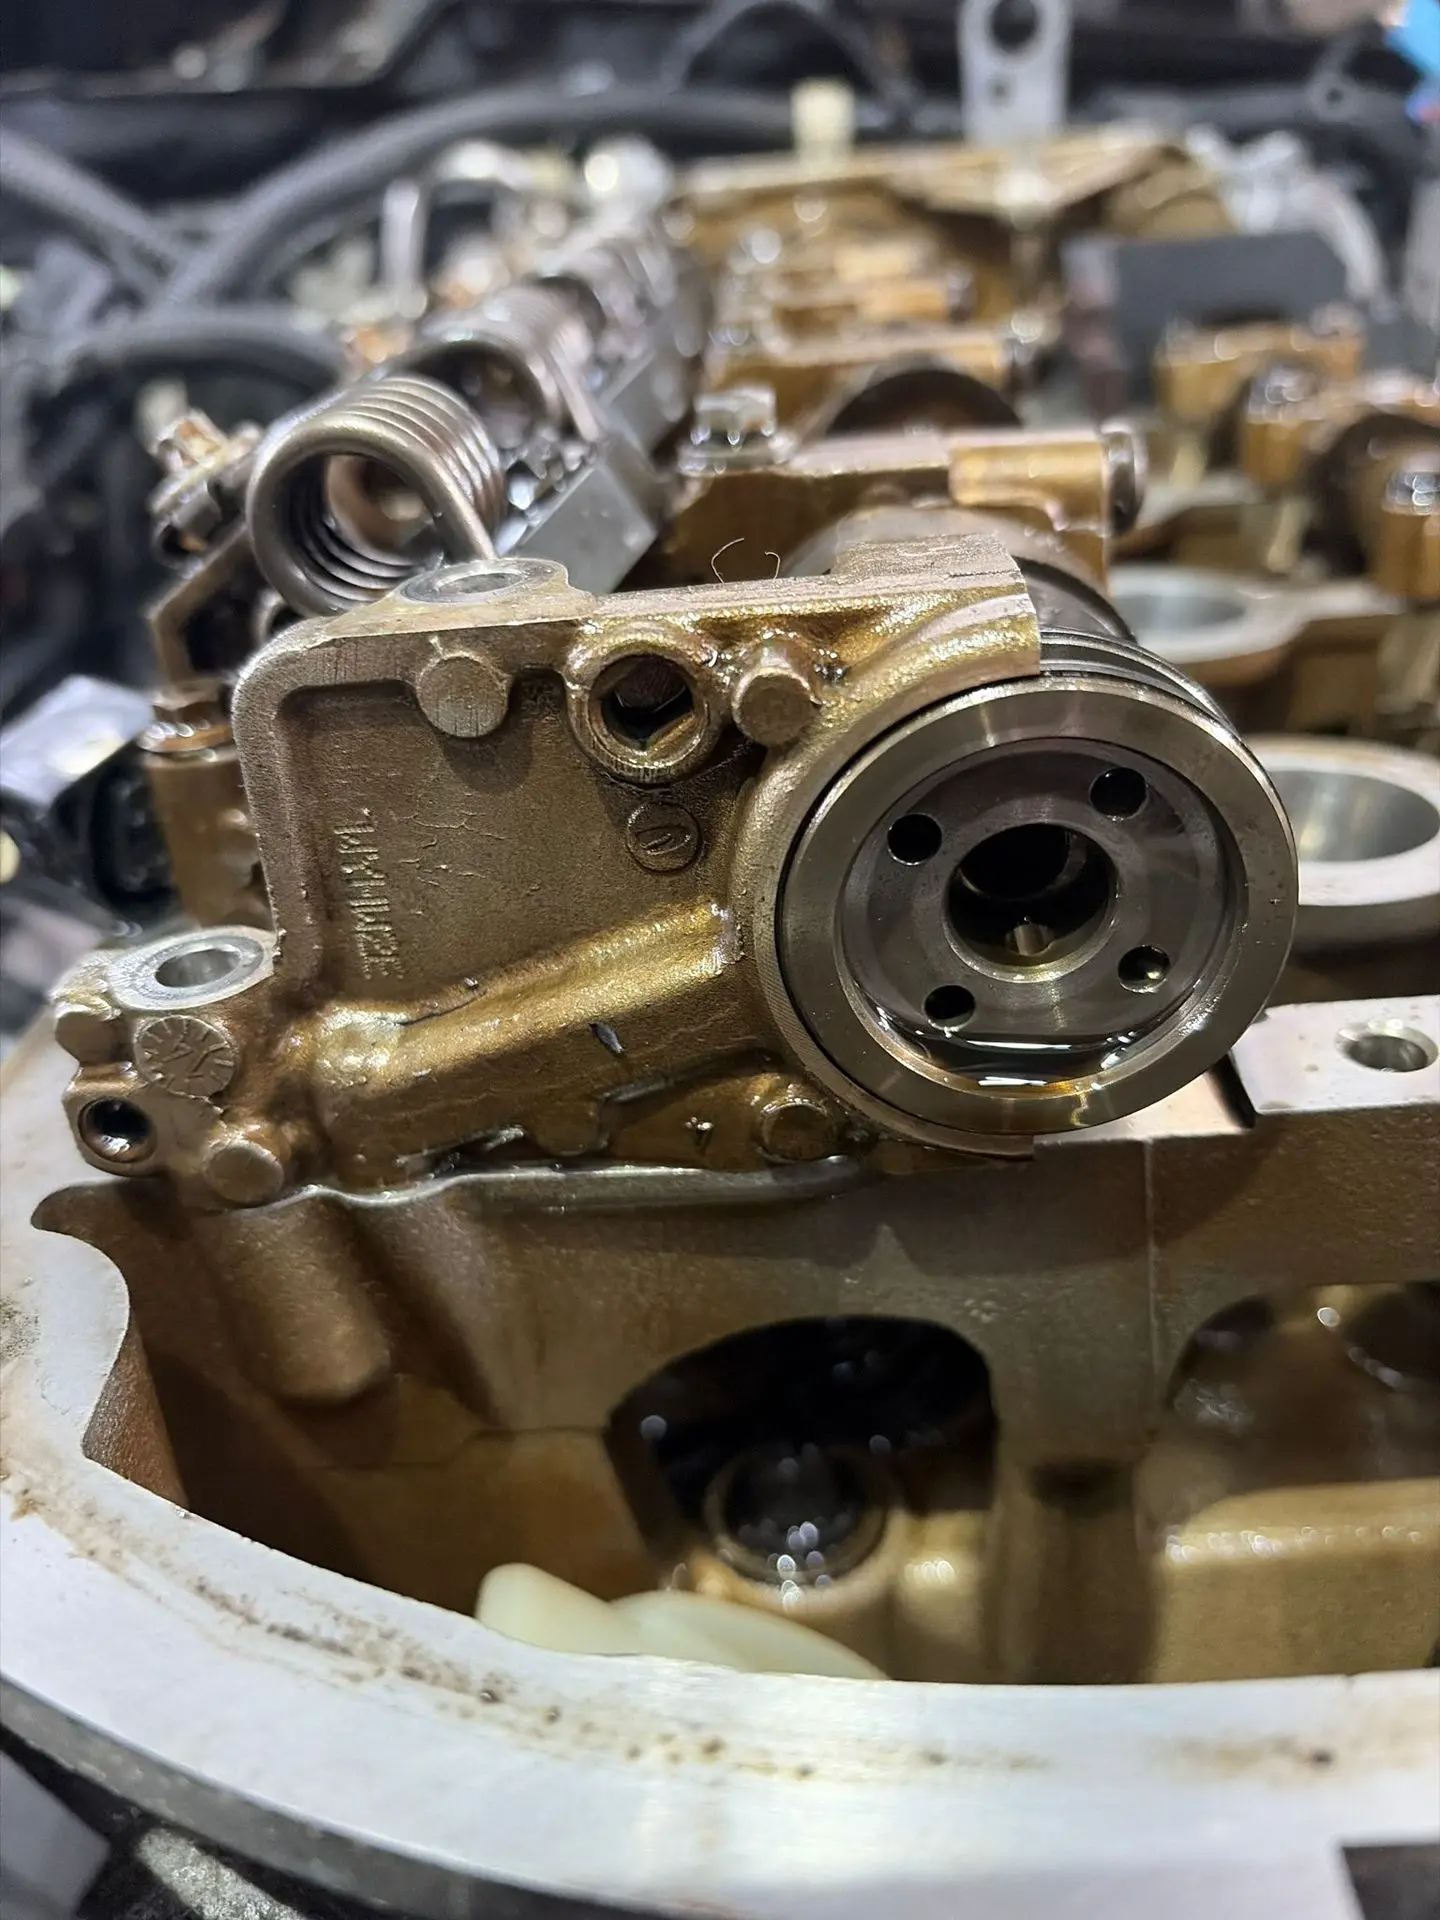
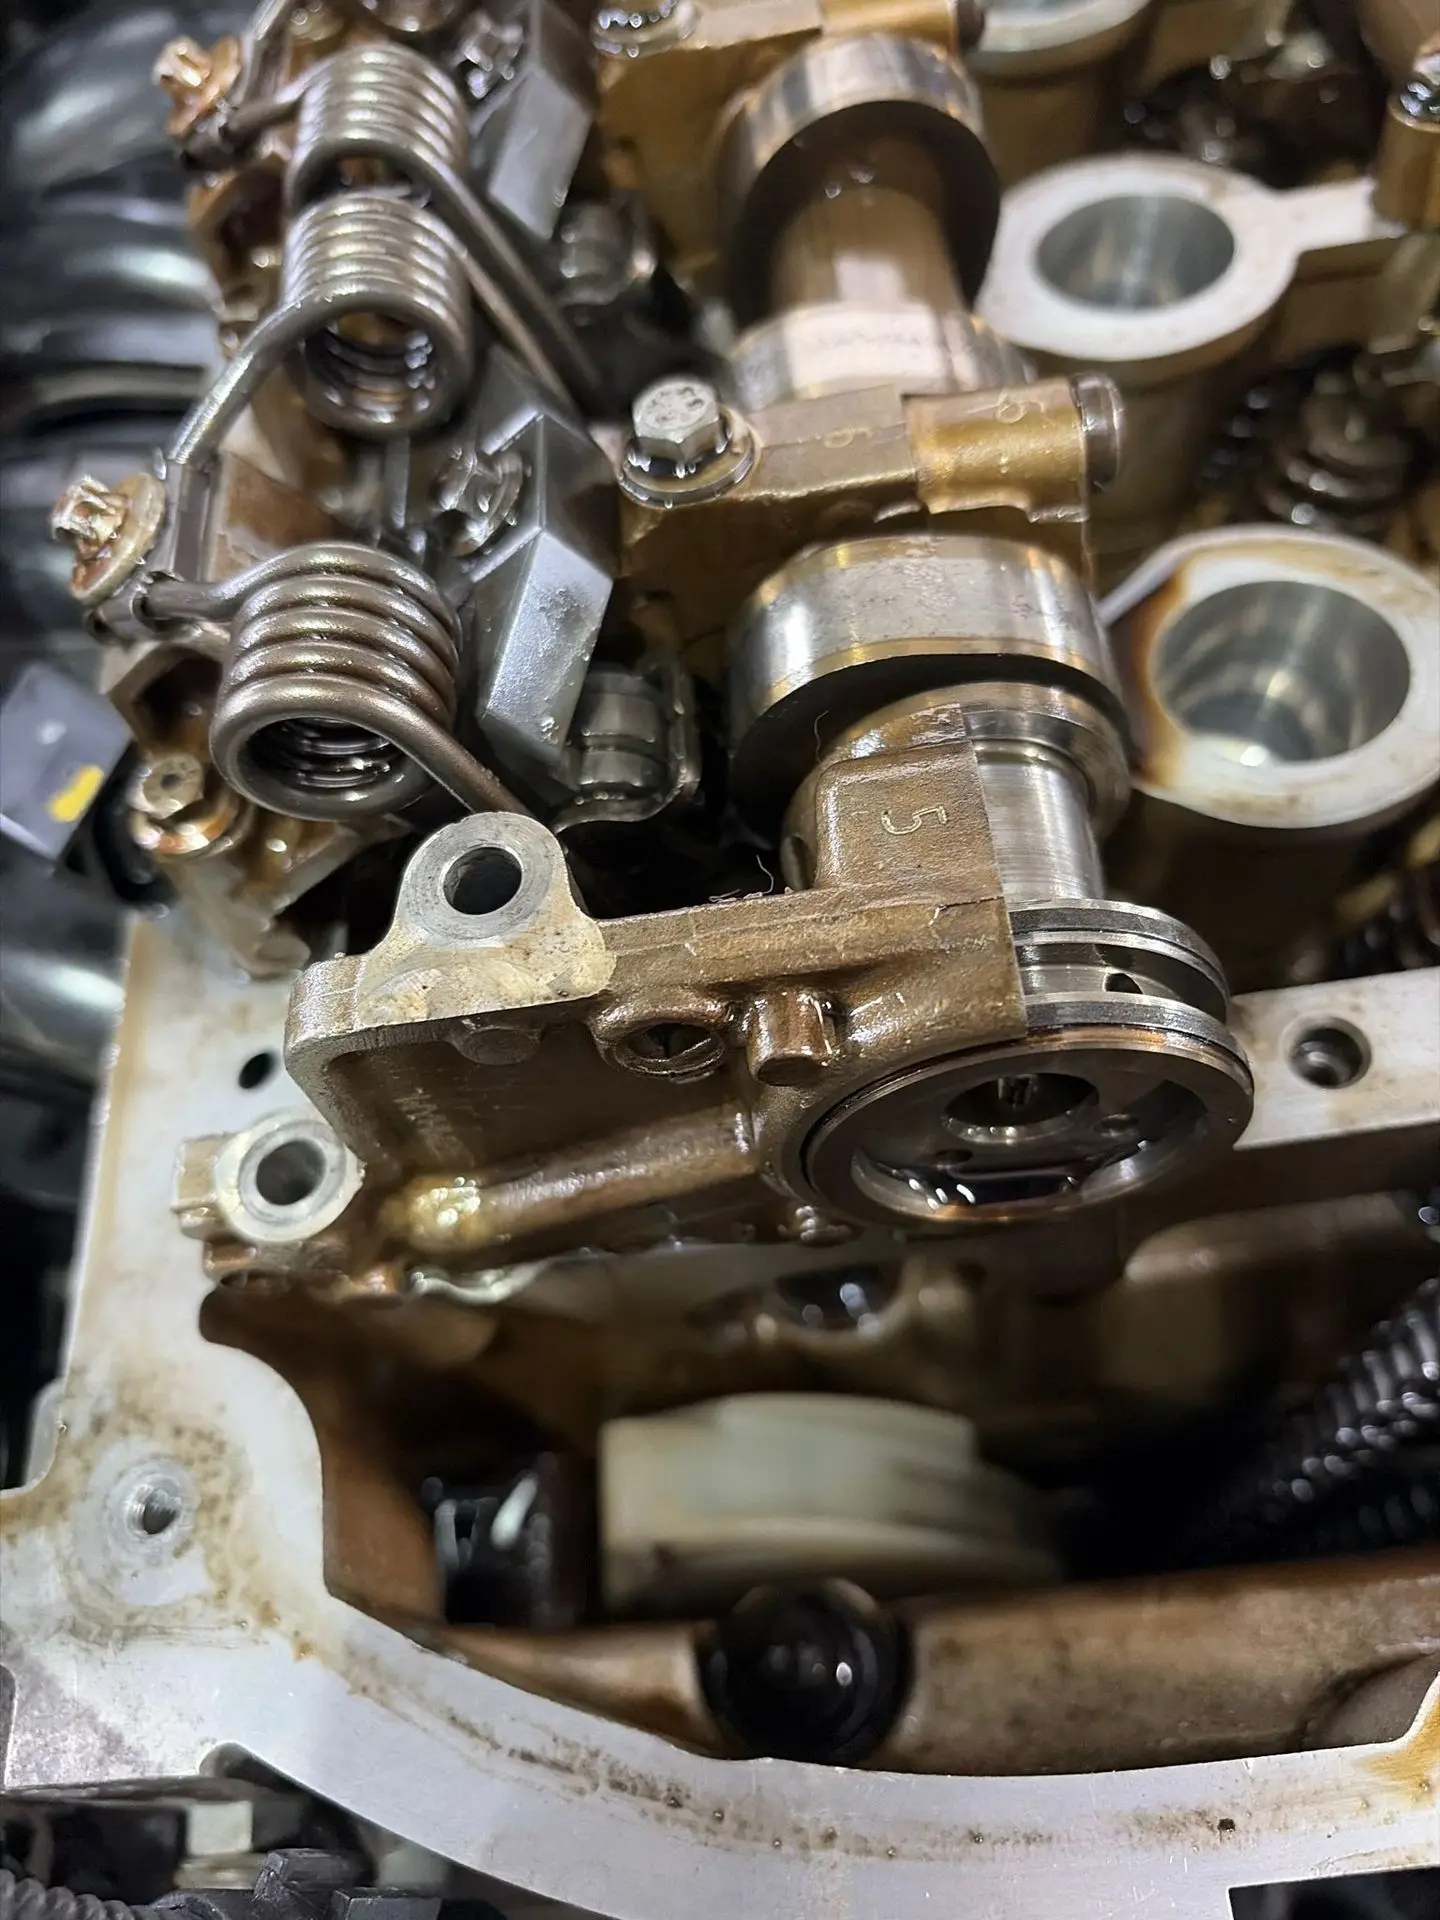
Behind the VANOS sprockets are the plastic rings that help influence the oil supply and oil pressure control to the VANOS. If they are heavily worn, problems can arise with loss of oil pressure or unwanted play.
We checked those parts too. We do see them wear and age on the N54 and N55 3.0-liter gasoline engines. Certain series there were made with steel rings, which causes much more wear on the rings and the bridge. On this engine we had never had problems with that, partly because they are made of plastic and not steel. Even so, at this point they were checked to be sure.
There we saw light wear, but nothing that seemed abnormal or convincingly defective at that moment. A lightly polished surface after 110,000 km is of course not abnormal. There was no clear burr present. That is why they were refitted. There was also no visible wear on the head of the camshaft where the VANOS is mounted.
At that point most of the classic causes of the problem had already been checked or ruled out.
The most likely explanation: contamination in the intake VANOS oil gallery
Because we had already seen contamination on the intake side, and because the fault kept stubbornly returning on that side, one hypothesis emerged ever more strongly: contamination in the fine oil circuit of the cylinder head.
That is also where the history becomes important again.
This engine's cylinder head had previously been overhauled and skimmed. In such a process a cylinder head is machined, cleaned and rebuilt. In theory it should be completely clean afterwards. In practice, experienced specialists know that residual contamination can sometimes remain in small oil galleries if a head was not perfectly flushed or re-flushed after the overhaul.
We cannot prove with absolute certainty that this was the only cause here. But technically it is a very plausible explanation for what we saw:
- persistent deviation on the intake VANOS,
- contamination on the intake solenoid,
- no clear serious mechanical defect,
- and a problem that ultimately only disappeared after intensive flushing of the oil circuit.
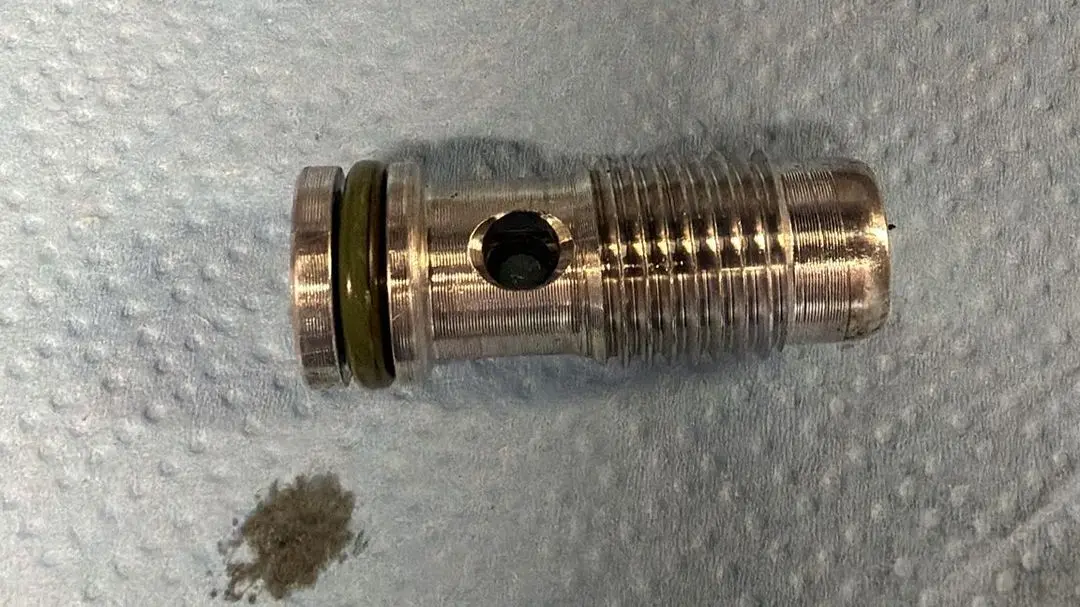
Non-return valve checked
We also checked the non-return valve on the intake side. It turned out to be clean and functioning correctly. If you can blow on it and the valve then moves in and out, it is working as it should.
So that was not a final diagnosis either, but once again an important exclusion in the overall picture.
Three oil flushes as the last logical step
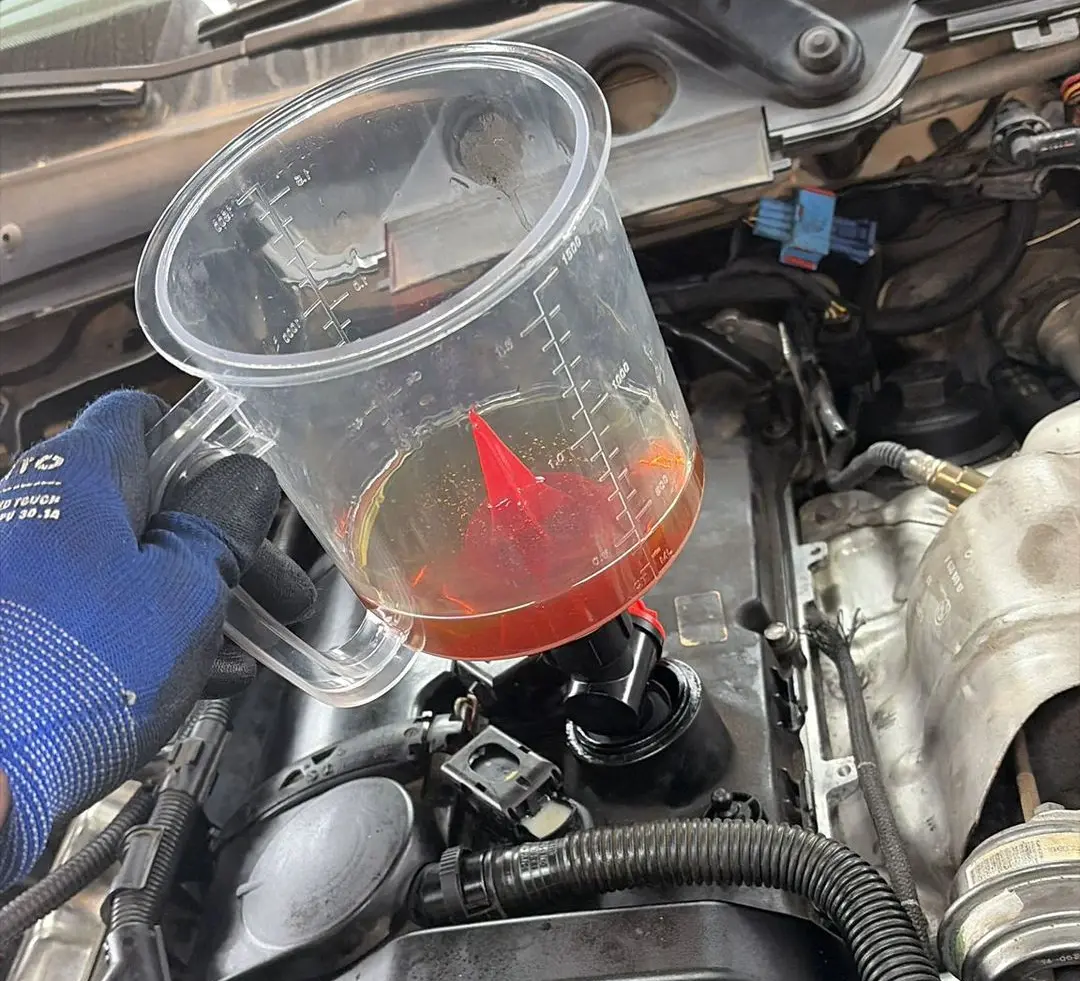
Because the oil galleries and hydraulic control of the VANOS on this engine are very fine, we then opted for an intensive flushing procedure.
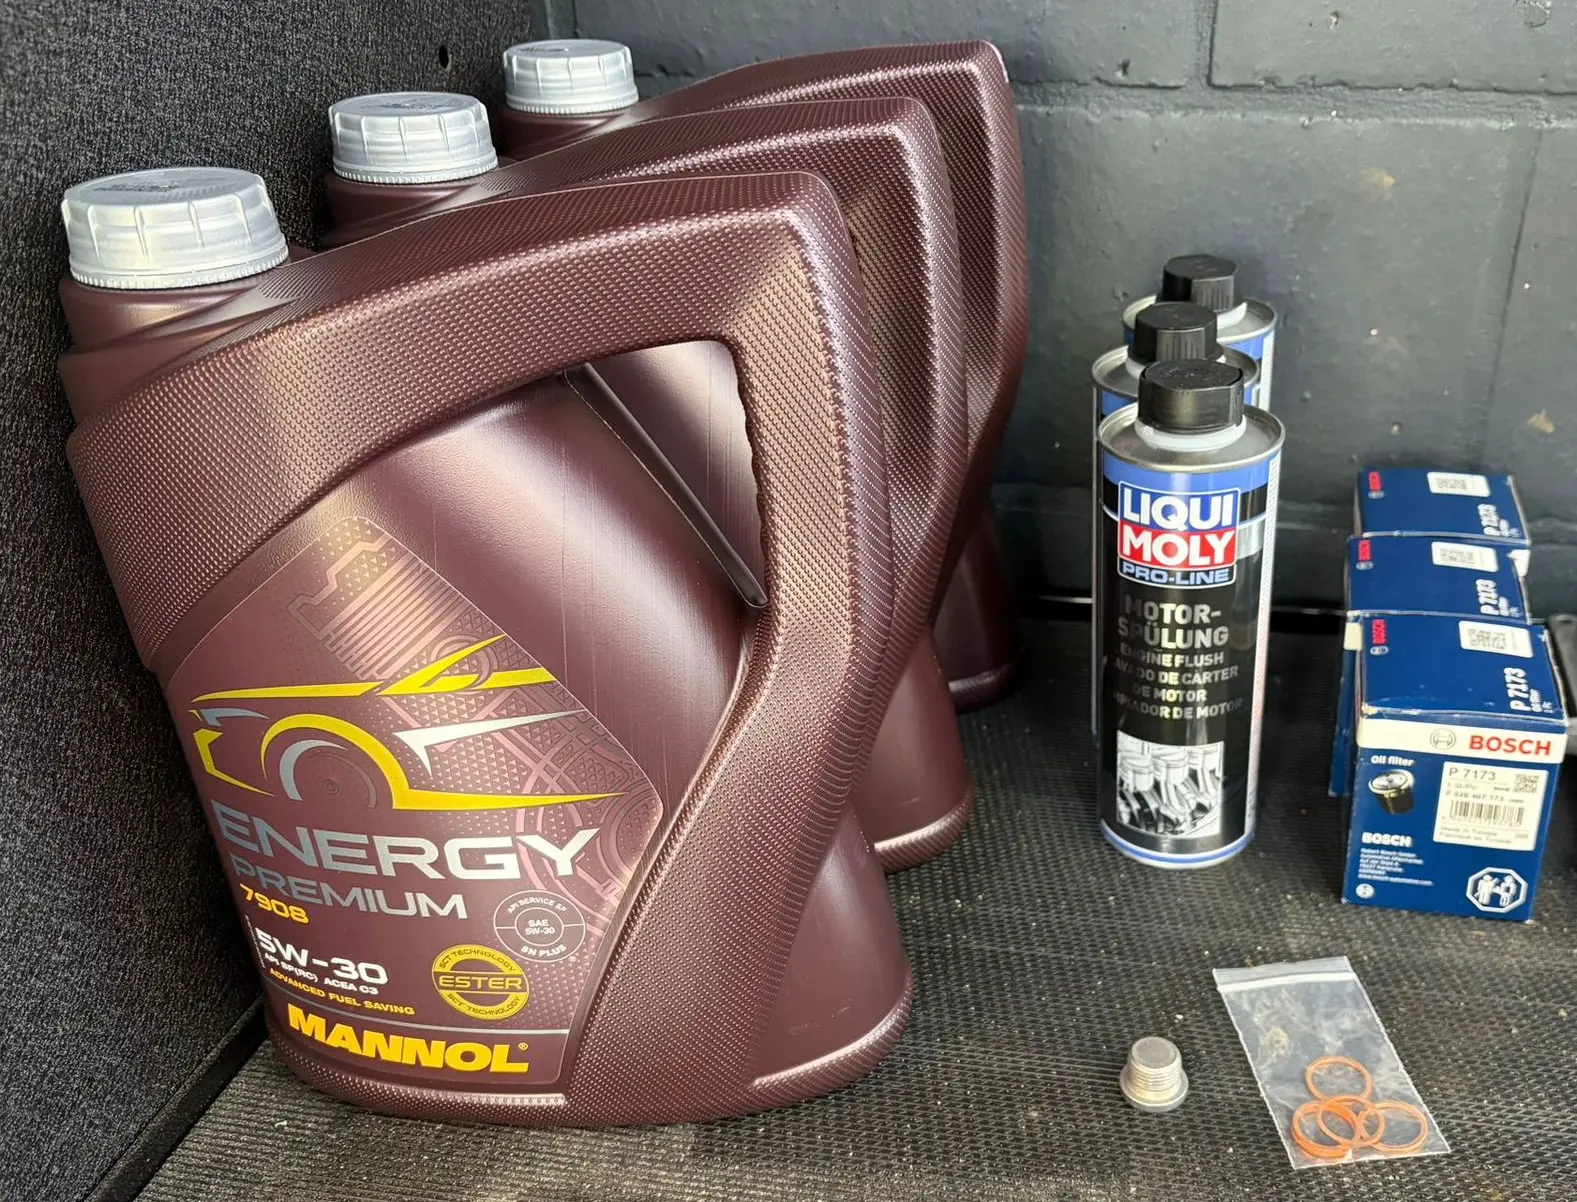
For this we worked three times with Liqui Moly Pro-Line Engine Flush, each time combined with fresh oil and a new oil filter.
Each cycle deliberately ran in several steps:
- bring the engine up to temperature,
- add the flush,
- let it idle,
- drive briefly under load,
- drain the oil,
- inspect the oil,
- replace the filter,
- refill with fresh oil,
- and carry out the next cycle.
That driving under load is important. The VANOS control works dynamically. As a result, the oil galleries involved actually open and close during use, so that any contamination can come loose better than when you only let the engine idle.
After each flush we also let the oil drain thoroughly, sometimes even overnight, and inspected what came out.
Only after the third flush did we definitively fit fresh oil and a new filter again.
Then came the breakthrough
After that flushing procedure we cleared the adaptations and ran the ABL/function test of the VANOS control on the intake side again.
This time that test finally did run through correctly.
That was the breakthrough in this case.
In addition, we saw that the exhaust stayed clean again, without black spatter. The engine ran much more smoothly and consistently. We then carried out hot-cold cycles and did another proper test drive.
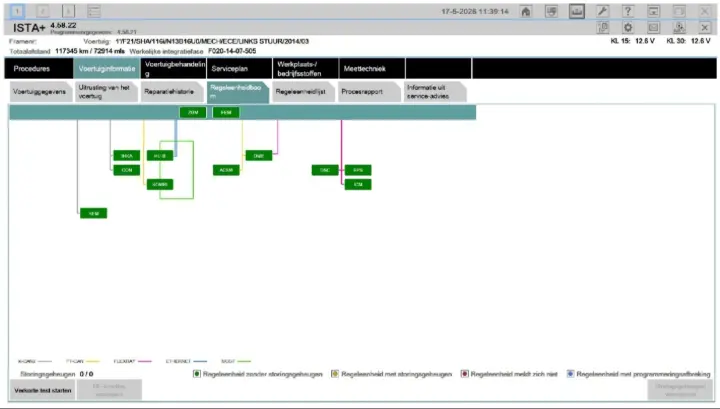
At that point the problem finally seemed solved. No mechanical indications of remaining problems, live data is fine and no fault codes.
What this case shows
This case shows perfectly why diagnosis in a garage does not always come down to one fault code and one part.
Sometimes there is not a single moment at which you can say:
“This one part was without any doubt the full cause of everything.”
Sometimes you end up with a combination of:
- history,
- earlier damage,
- several small deviations,
- contamination,
- plausible suspect components,
- mechanical checks,
- function tests,
- compression and leak-down tests,
- scope measurements,
- test drives,
- and ruling out causes step by step.
In such a case you sometimes replace parts while you cannot yet prove with 100% mathematical certainty beforehand that precisely that part alone is causing the entire problem.
But that is something different from blindly firing parts at it.
You do it because:
- the part is suspect within the overall fault pattern,
- the test results point in that direction,
- the mileage justifies replacement,
- repeated disassembly would cause double work,
- and you want to give the customer a lasting solution.
Our view on warranty
For us, warranty does not mean: doing the absolute minimum and hoping the complaint stays away.
Warranty means: keep searching until the car works correctly.
Even if that means more work, more parts and more time for us than initially thought.
In this case we chose the technically safer and more correct route several times, even when that was not in our financial favor. Not because we wanted to replace things at random, but because we did not want to saddle the customer with a half-solved problem again.
Conclusion
This BMW N13 did not have one simple defect, but a complete technical story:
- a history of cylinder head damage,
- an earlier correct diagnosis where others found no solution,
- new jerking and rough engine behavior,
- deviations on cylinder 4,
- persistent VANOS faults,
- no black-and-white final diagnosis in one step,
- and ultimately a solution that was only reached by continuing to work logically, thoroughly and persistently.
That is the reality of real diagnostics.
Not always fast.
Not always simple.
But correct.
Do you have a BMW or MINI with a jerking engine, rough idling, persistent VANOS faults or a problem that several garages have already looked at without a real solution? Then we do not look only at fault codes, but at the complete technical story behind the complaint.
At BimmerStore we do not go for the quickest conclusion, but for the most correct approach. Contact us for a quote or appointment.
BimmerStore is an independent BMW and MINI specialist in Herenthout (province of Antwerp, Belgium). We diagnose faults and fault codes on BMW and MINI in our own workshop, by appointment.
BMW N13 with a jerking engine and fault codes 130108 & 130F20